创意藏在每一道折痕里
Origami tulip
Fold one square sheet into a blooming tulip in fourteen steps, starting from a Water-bomb Base and finishing with four petals peeled open.
- 简单
- 14步
- About 12 minutes
- 1 square sheet
Paper: One 6 × 6 in (15 × 15 cm) square of Kami origami paper.

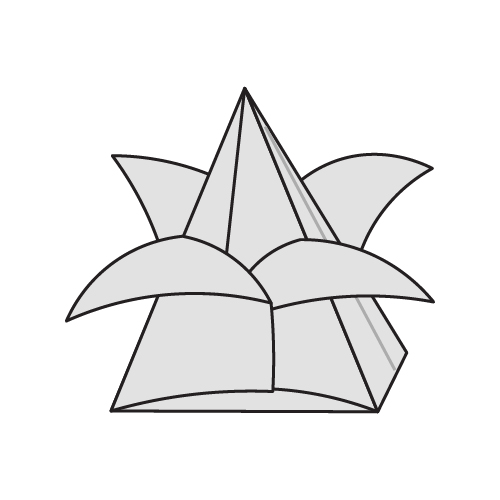
Your tulip is ready!
14
numbered steps from square to tulip
4
creases that set up the Water-bomb Base
15cm
square Kami paper
0
cuts, glue or tape needed
Before you fold
The diagrams use arrows and fold marks to show the direction of each move.
Dashed line
Fold along here. The line disappears inside the model once folded.
Curved arrow
This shows the direction the paper travels.
Solid arrows
Fold or press the indicated layers in this direction.
Shading
The shaded part is the layer currently facing you.
Steps 1 to 5 build the Water-bomb Base, so crease them sharply. Step 13 needs a puff of air, so keep the bottom hole open until then.
Fold your tulip
Step 1 of 14

Step 01
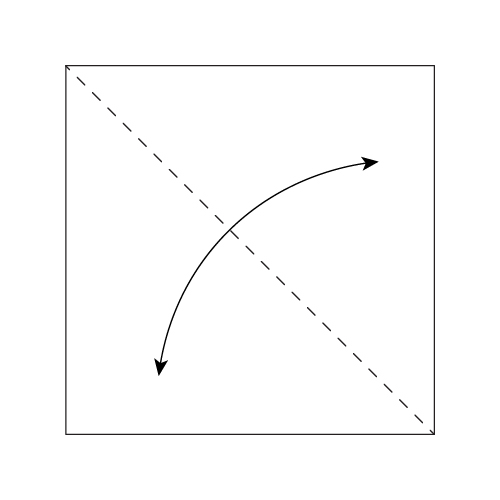
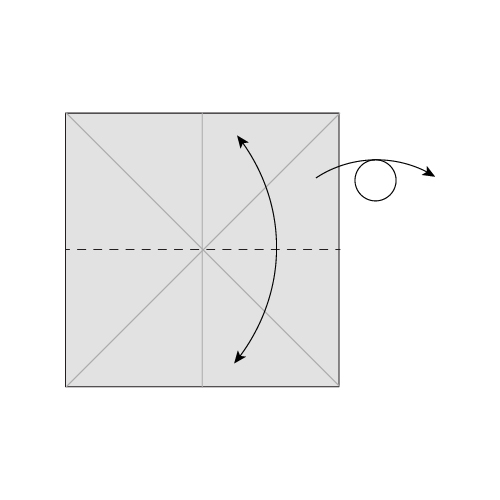
Crease one diagonal
Start with the white side up. Fold the paper in half diagonally and unfold.
You should seeA flat square with one diagonal crease running corner to corner.

Step 02
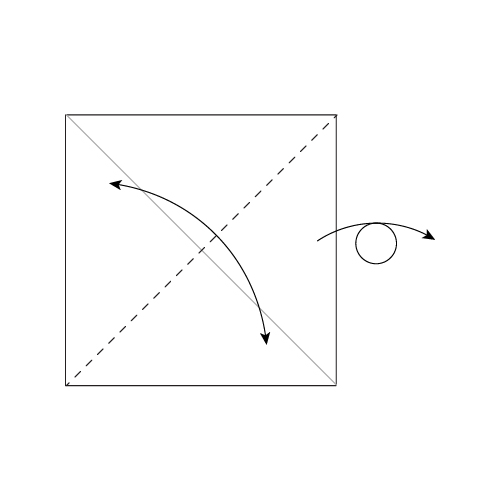
Crease the other diagonal
Fold in half diagonally the other way and unfold. Turn the paper over.
You should seeA square with both diagonals creased, now with the coloured side facing you.

Step 03
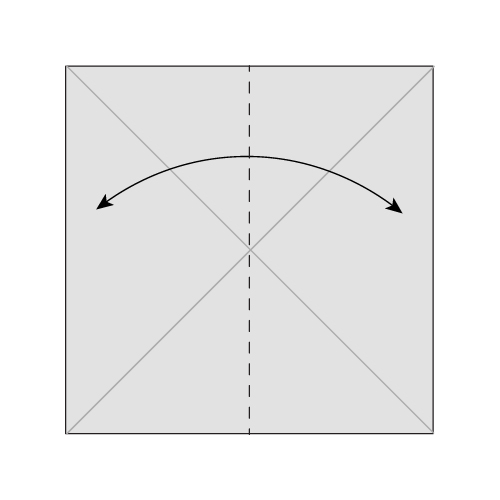
Crease the vertical centre
Fold in half vertically and unfold.
You should seeThe two diagonals plus a vertical crease through the middle.

Step 04
Crease the horizontal centre
Fold in half horizontally and unfold. Turn the paper over.
You should seeA square marked with four creases meeting at the centre point.

Step 05
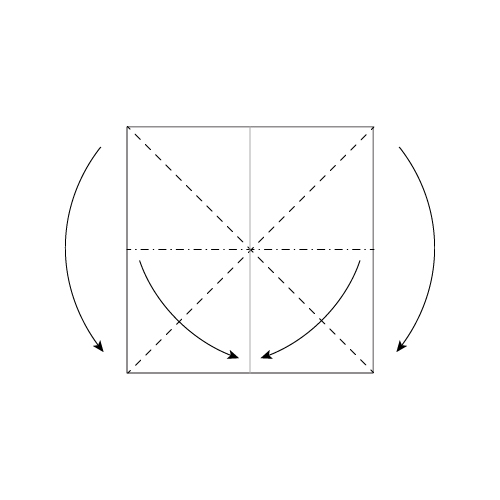
Collapse the Water-bomb Base
Collapse the model into a Water-bomb Base, bringing the sides in as the top drops down.
You should seeA flat triangle made of four layers, with two loose flaps on each side.

Step 06
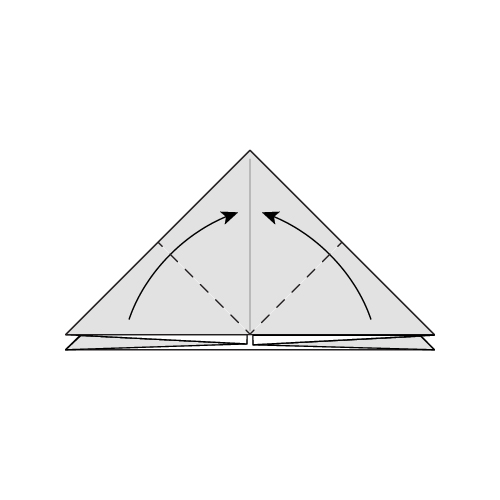
Fold the bottom corners up
Fold the bottom corners of the top layer up to the centre line.
You should seeA diamond on the front face, with both lower corners meeting at the top point.

Step 07
Repeat behind
Turn the model over and repeat step 6 on this side.
You should seeA matching diamond on the back, so both faces now look the same.

Step 08
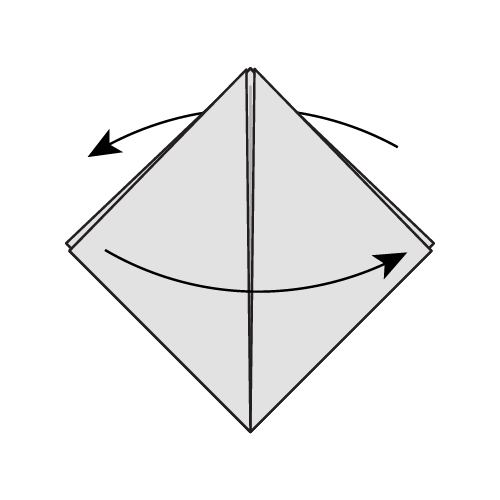
Flip one flap each side
Flip one flap to the right in the front and back, so fresh surfaces face you.
You should seeA smooth diamond front and back, with the loose edges rearranged.

Step 09
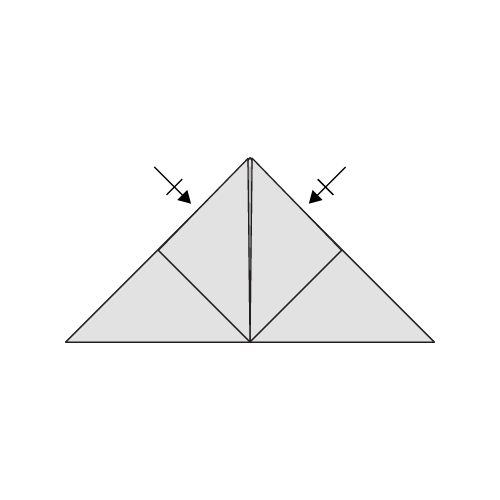
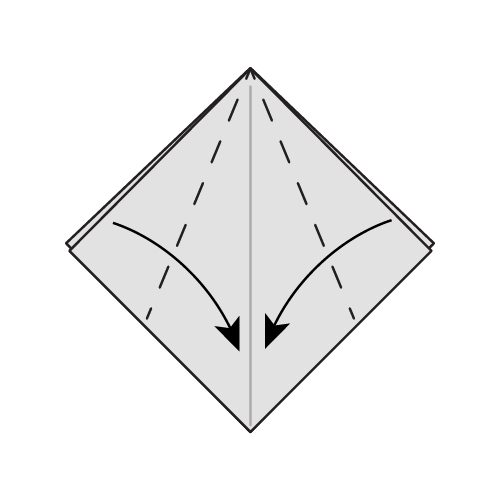
Fold the flaps past the centre
Fold the flaps of the top layers slightly past the centre line.
You should seeTwo flaps overlapping a little at the middle of the diamond.

Step 10
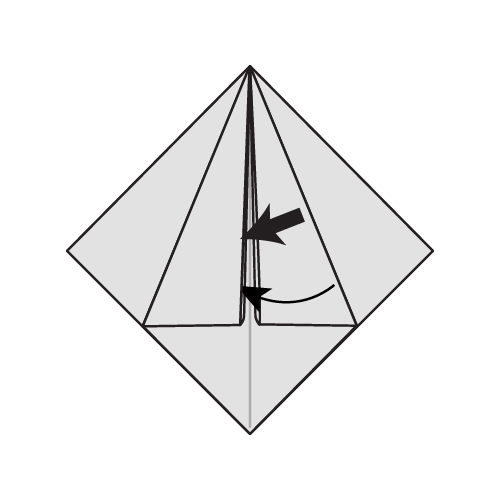
Tuck one flap into the other
Open up the left 'pocket', and insert the right flap inside it.
You should seeThe two flaps locked together, holding the front face closed.

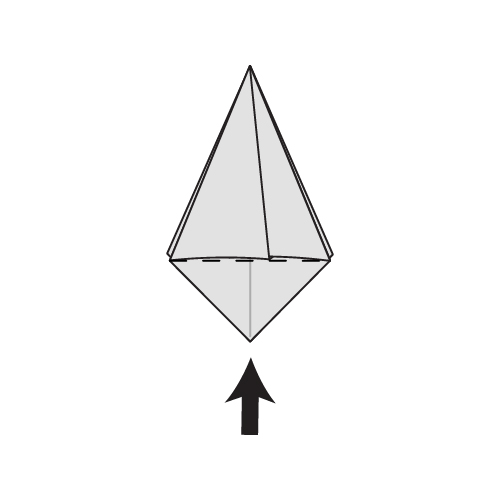
Step 11
Repeat behind
Turn the model over and repeat steps 9 and 10 on this side.
You should seeBoth faces locked, leaving a narrow shape with a small hole at the bottom.

Step 12
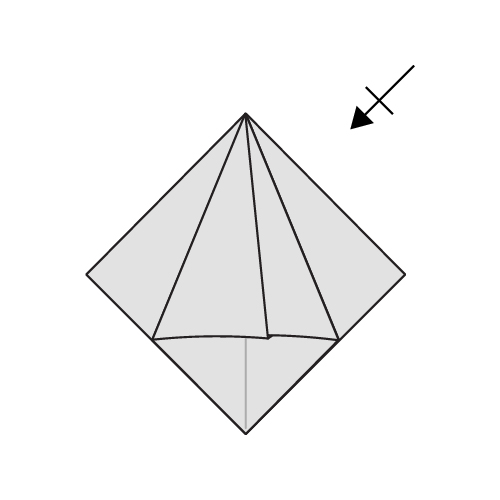
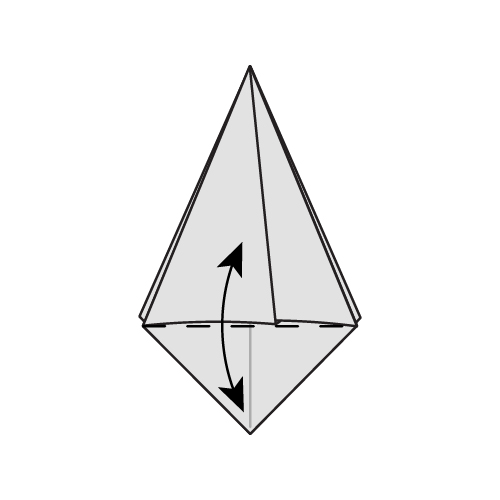
Fold and unfold the bottom
Fold and unfold the bottom section from both sides.
You should seeA crease across the lower part of each side, ready to shape the base.

Folding tip: if the balloon doesn't inflate, try pinching the top while blowing. If it still doesn't work, gently flatten the bottom with one finger. 
Step 13
Inflate the model
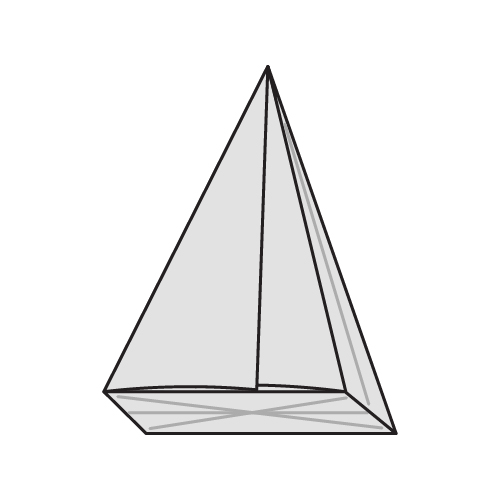
Blow into the bottom hole to inflate and flatten the model. The bottom should be a square shape.
You should seeA puffed-up body sitting on a flat square bottom.

Step 14
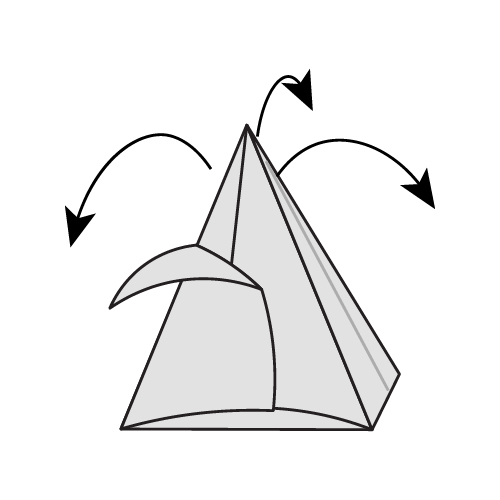
Peel out the petals
Peel out all 4 outer layers to create the petals.
You should seeFour petals curving outward from the inflated base — your finished tulip.
Use the arrow keys to move between steps
Step 1 of 14: Crease one diagonal

Your tulip is ready!
Curl each petal over a finger so it holds its shape, then stand the tulip on its flat square base.
Traditional design, diagrammed by Kelly Tan and published by Origami.me.
- If the tulip will not stand
- Flatten the bottom square against the table so the four base edges sit level.
- If a petal tears as you peel it
- Open the layer more slowly from the tip, keeping the paper flat against your thumb.
- If the model will not inflate
- Check that step 12 left the bottom section unfolded, then blow steadily into the small hole.