创意藏在每一道折痕里
Origami penguin
Fold one square sheet into a small, standing penguin.
- 非常简单
- 7步
- About 5 minutes
- 1 square sheet
Paper: One 6 × 6 in (15 × 15 cm) square of Kami origami paper.

Your origami penguin is ready!
7
numbered steps from square to penguin
1
diagonal crease used as a reference
15cm
square Kami paper works perfectly
0
cuts, glue or tape needed
Before you fold
The diagrams use arrows and fold marks to show the direction of each move.
Dashed line
Fold along here. The line disappears inside the model once folded.
Curved arrow
This shows the direction the paper travels. A looped arrow means turn the model over.
Solid arrows
Lift or fold the indicated flap in the arrow's direction.
Colour and white
Colour is the front of the sheet, white is the back.
Make each crease sharp and keep the two sides aligned before folding the head.
Fold your penguin
Step 1 of 7

Step 01
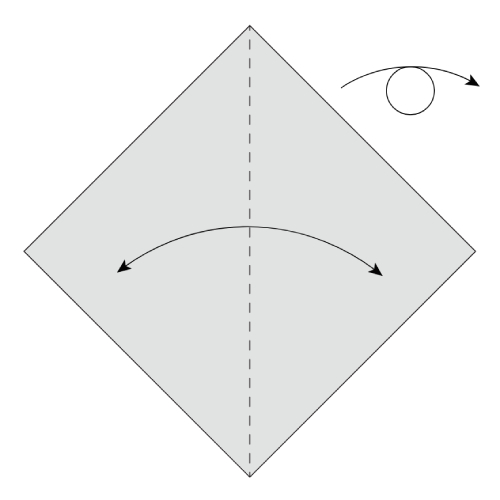
Make a diagonal crease
Start with the coloured side up. Fold the paper in half diagonally and unfold it, then turn the paper over.
You should seeA white diamond with one vertical diagonal crease.

Step 02
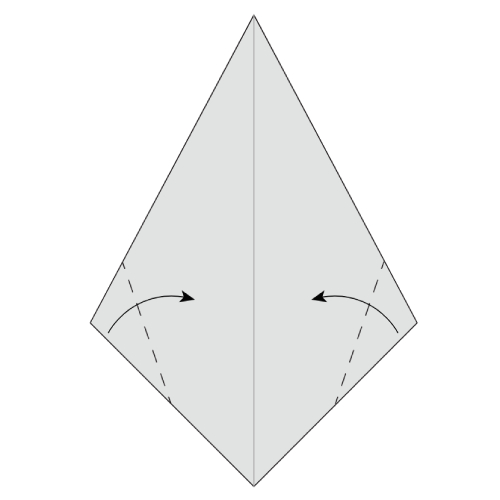
Fold the top edges inward
Fold both top edges inward. Stop before they reach the centre line.
You should seeTwo long flaps angled toward the centre, with a gap between them.

Step 03
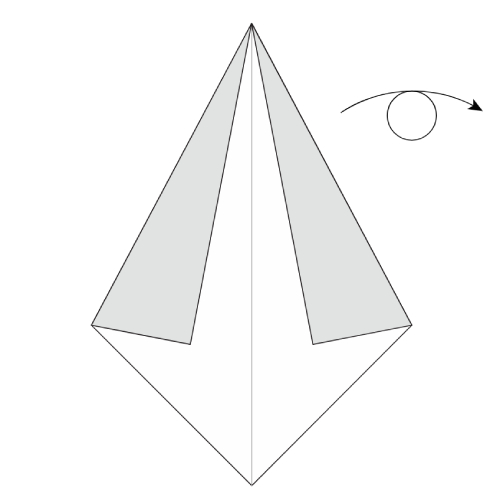
Turn the model over
Turn the model over.
You should seeThe folded flaps are now behind the diamond.

Step 04
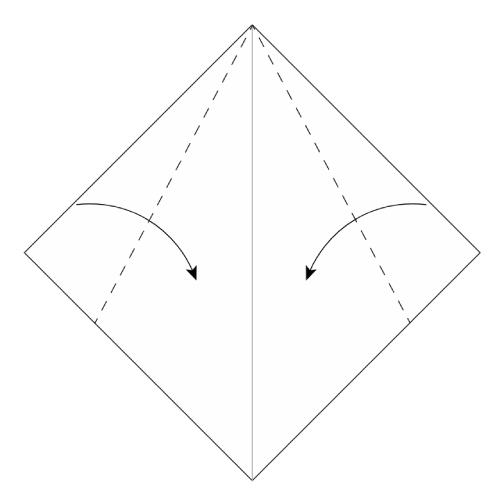
Fold the corners inward
Fold the left and right corners inward along the dotted lines.
You should seeA narrowed lower shape with matching folded corners.

Step 05
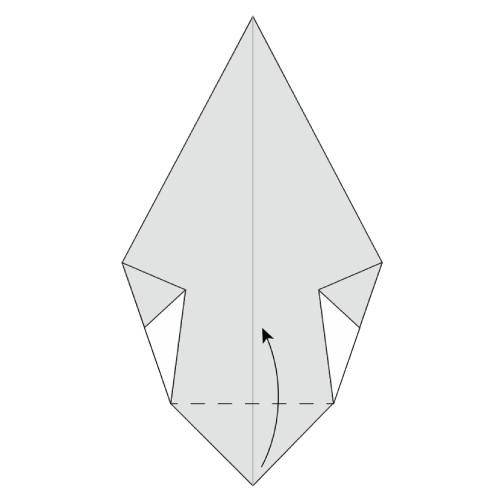
Fold the bottom corner up
Fold the bottom corner upward, using the corners of the previous folds as reference points.
You should seeThe bottom point raised into the middle of the model.

Step 06
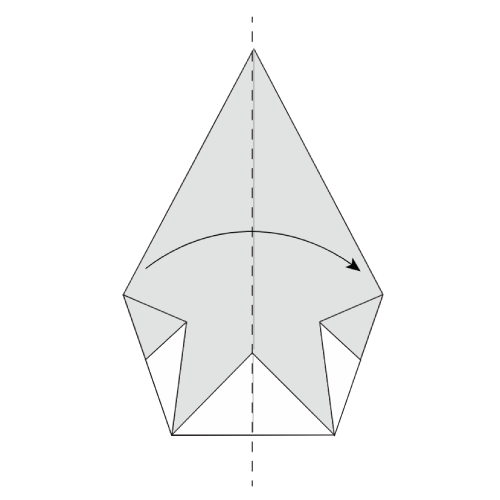
Fold the model in half
Fold the model in half using the crease from step 1.
You should seeA slim side view with the folded layers together.

Step 07
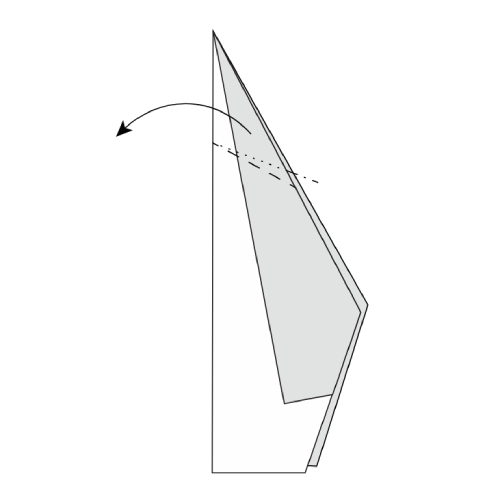
Reverse-fold the head
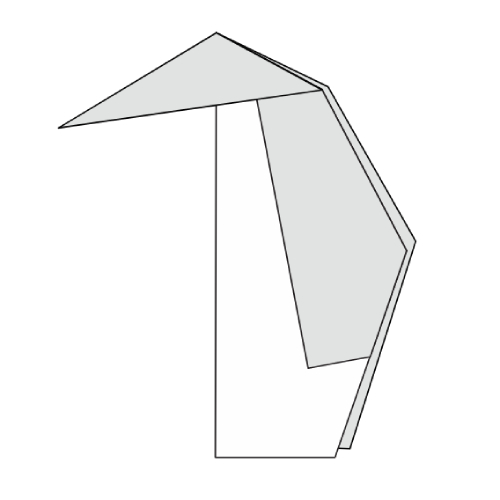
Make an outside reverse fold to create the head.
You should seeA small standing penguin with a pointed head.
Use the arrow keys to move between steps
Step 1 of 7: Make a diagonal crease

Your origami penguin is ready!
Set the penguin on a flat surface and gently adjust the head so it stands neatly.
Traditional design, diagrammed by Kelly Tan and published by Origami.me.
- If the penguin leans
- Reopen the final fold slightly and align the bottom edges before creasing again.
- If the layers resist folding
- Ease the paper apart and remake the diagonal crease with a lighter touch.
- If the head looks too flat
- Repeat the outside reverse fold in step 7 with a slightly firmer crease.