Creativity in every crease
Origami swan
Fold one square sheet into a graceful swan in ten steps, finishing with two lifted folds that shape its neck and head.
- Super easy
- 10 steps
- About 8 minutes
- 1 square sheet
Paper: One 6 × 6 in (15 × 15 cm) square of Kami origami paper.
Written and reviewed by InThink Guide team
Editorial review: September 14, 2026
References consulted: Origami.me
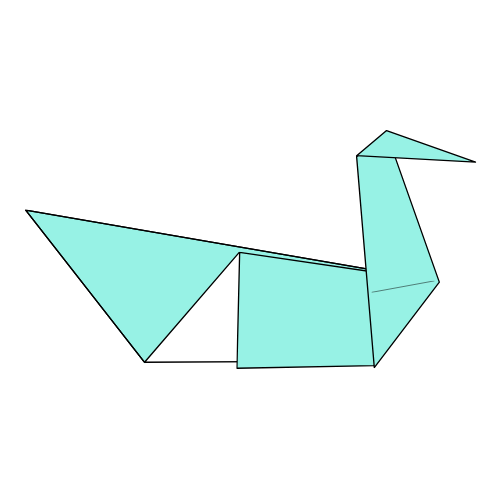
Your swan is ready!
10
numbered steps from square to swan
2
rounds of folding edges to the centre
15cm
square Kami paper
0
cuts, glue or tape needed
Before you fold
The diagrams use arrows and fold marks to show the direction of each move.
Dashed line
Fold along here. The line disappears inside the model once folded.
Curved arrow
This shows the direction the paper travels.
Solid arrows
Fold or press the indicated layers in this direction.
Shading
The shaded part is the layer currently facing you.
Steps 7, 9 and 10 have no exact reference point, so fold them to the position you like best. Crisp creases keep the neck standing.
Fold your swan
Step 1 of 10
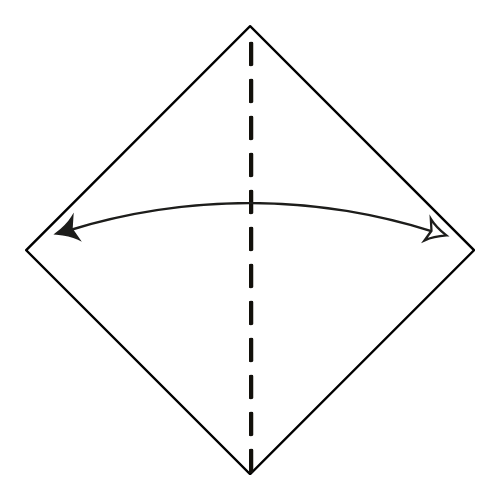
Step 01
Make the centre crease
Start with the white side facing up in a diamond position. Fold the paper in half vertically, then unfold to create a centre crease.
You should seeA flat diamond with one vertical crease from the top corner to the bottom corner.
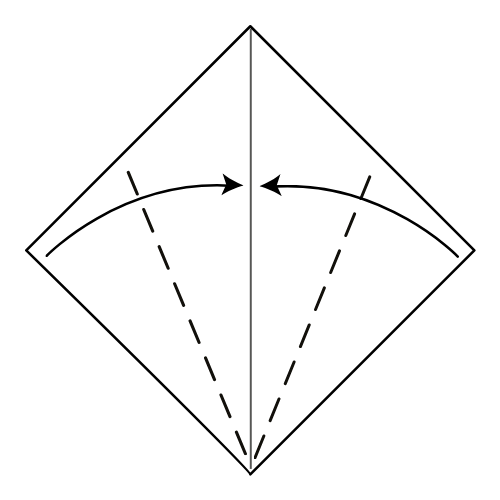
Step 02
Fold the bottom edges in
Fold the bottom edges to meet the vertical centre crease.
You should seeA kite shape, with both lower edges lying along the centre line.
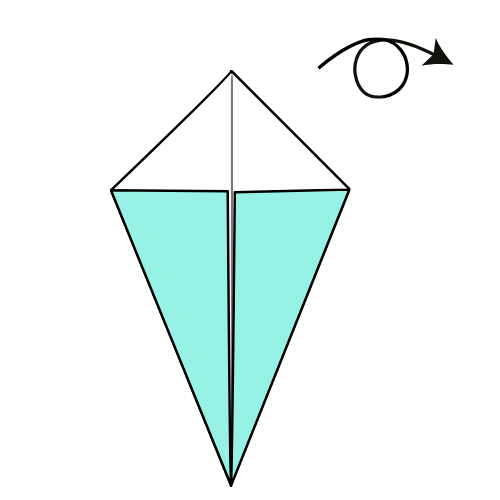
Step 03
Turn the paper over
Turn the paper over.
You should seeThe same kite shape with the coloured side facing you.
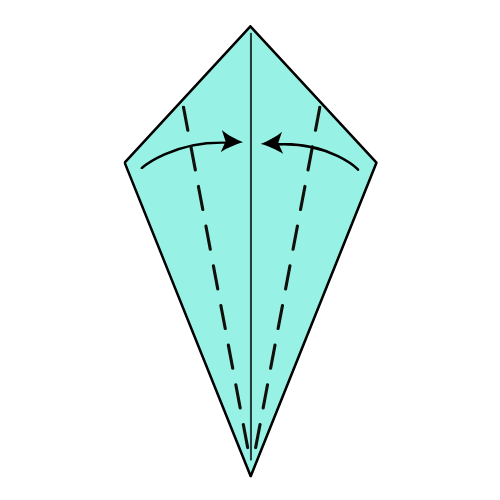
Step 04
Fold the bottom edges in again
Fold the bottom edges to the centre crease again.
You should seeA narrower kite, slimmer than the shape you started this step with.
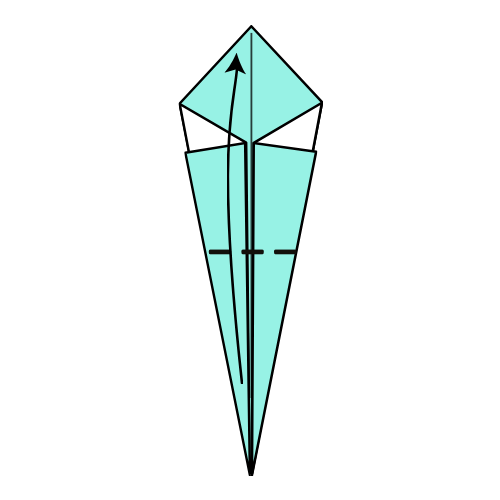
Step 05
Fold the bottom corner up
Fold the bottom corner up to meet the top corner.
You should seeA long narrow shape with the bottom point brought up to the top point.
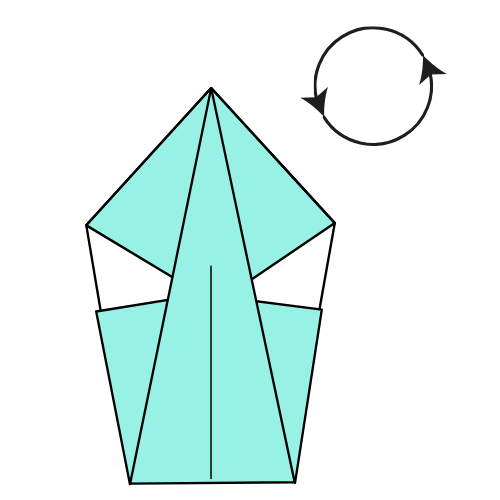
Step 06
Rotate the model
Rotate the paper 90° counterclockwise.
You should seeThe same shape lying on its side, with the point facing left.
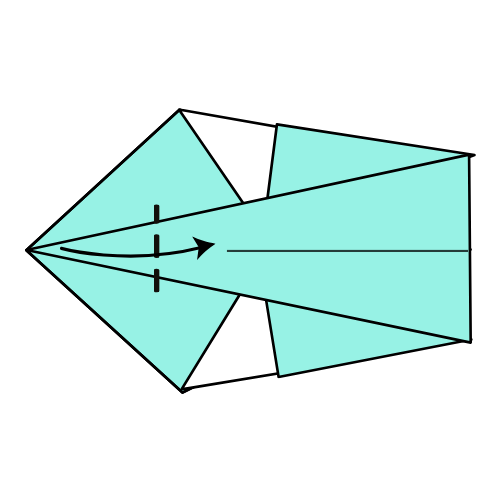
Step 07
Fold the head flap across
Fold the top flap's left corner to the right. There is no exact reference point, so fold it to your preferred position. This will become the swan's head.
You should seeA small pointed flap folded back to the right, ready to become the head.
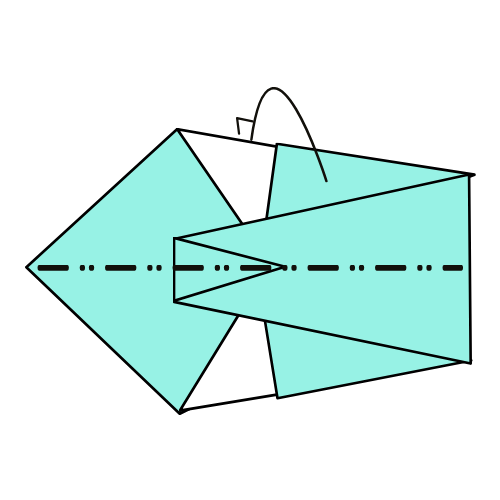
Step 08
Mountain fold in half
Mountain fold the top section to the back of the model, folding it in half.
You should seeThe model halved along its length, with both sides matching.
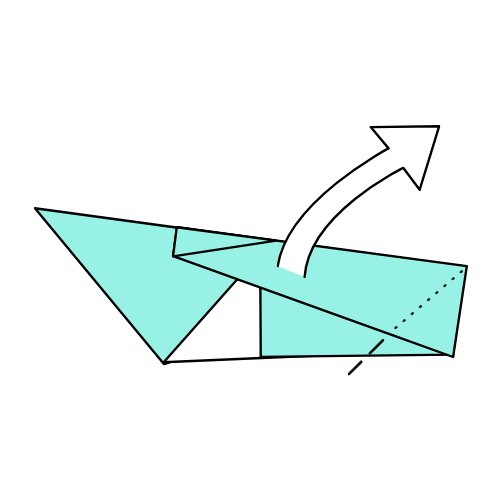
Step 09
Lift the neck
Pull the swan's neck upward, adjust the angle to your liking, then flatten the paper.
You should seeThe neck standing up from the body, with a new crease holding the angle.
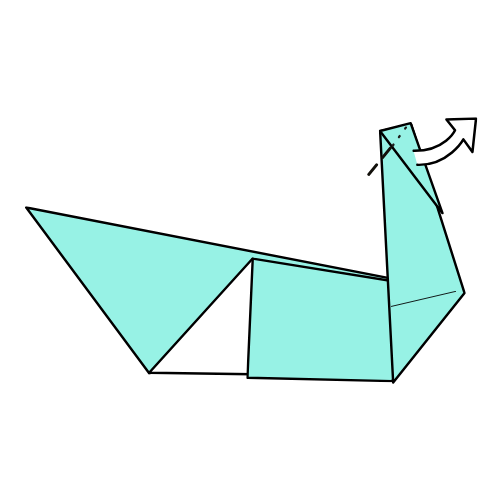
Step 10
Lift the head
Repeat the same process for the swan's head. Lift it up, adjust the angle to your liking, then flatten it.
You should seeA finished swan with a raised neck and a small head tilted at the top.
Use the arrow keys to move between steps
Step 1 of 10: Make the centre crease
Your swan is ready!
Adjust the angle of the neck and head until the swan balances, then flatten each fold to hold its shape.
Traditional design, diagrammed by Nick Robinson and published by Origami.me.
- If the swan will not stand
- Open the base slightly along the step 8 mountain fold so the two halves spread apart.
- If the neck tears as you lift it
- Ease the fold open a little, then pull the neck up more slowly before flattening it again.
- If the neck leans to one side
- Reopen the step 9 fold and lift the neck again, keeping it square to the body.