접을 때마다 피어나는 창의력
Origami 장미
1개의 정연한 장을 9개의 주의깊게 설명된 겹에 있는 층을 둔 종이 장미로 도십시오.
- 아주 쉬움
- 9단계
- 약 10분
- 1개의 정연한 장
종이: 1 6 × 6 (15 × 15cm) 광장Kami또는Tantorigami 종이.
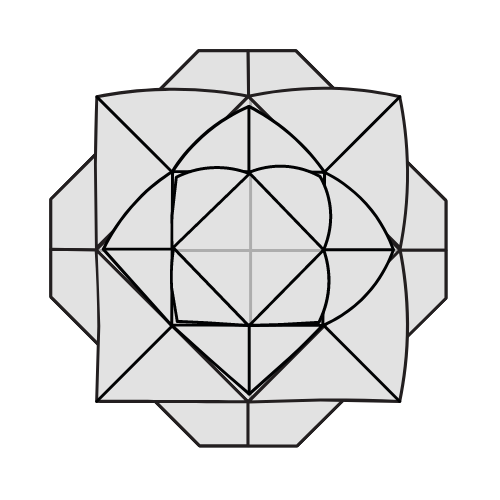
당신의 장미가 준비되어 있습니다!
9 월
사각형에서 장미로
3개
센터로 접는 라운드
크기: 15cm
사이트맵Kami또는Tant자료실
0 댓글
커트, 접착제 또는 테이프 필요
접기 전에
다이어그램은 화살표를 사용하고 각 움직임의 방향을 보여줍니다.
Dashed 라인
여기로 접어. 선은 일단 접힌 모형 안쪽에 사라집니다.
곡선 화살표
이것은 종이 여행 방향을 보여줍니다.
연락처
접히거나 이 방향으로 표시된 층을 누릅니다.
회사 소개
그늘진 부분은 현재 당신을 직면하는 층입니다.
층 구조로 정렬 된 중앙 유지. Crisp, 심지어 creases 도움 애완 동물은 끝에서 깔끔하게 앉아.
당신의 장미
한국어1이름 *9
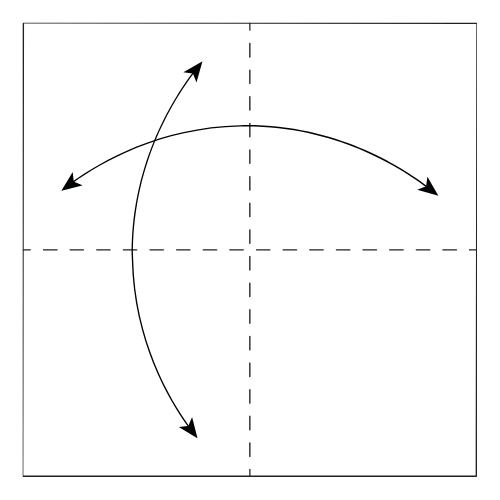
한국어01
둘 다 센터 creases를 만드십시오
접히고 절반에서 광장을 펼치십시오.
자주 묻는 질문수평과 수직 중심 주름을 가진 편평한 사각.
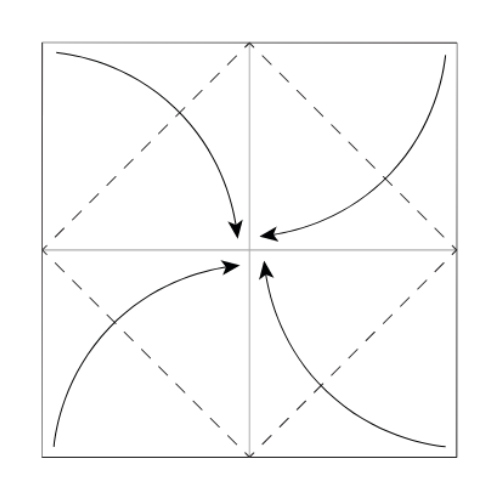
한국어02
건물에
중앙 선에 측을 접어, 그 후에 종이를 켜십시오.
자주 묻는 질문4개의 패널로 분할되는 사각은, 다른 측으로 위로 직면합니다.
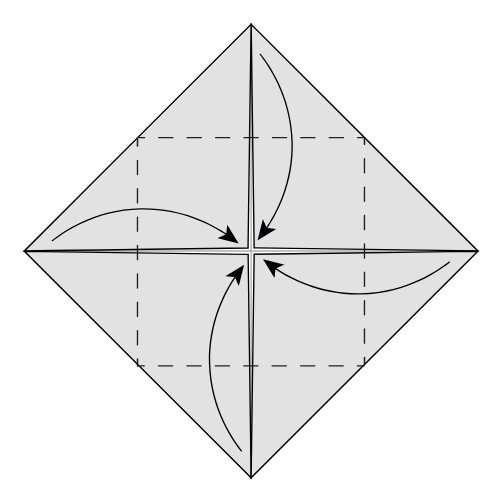
한국어03
코너에서 접어
모든 4 개의 모서리를 중앙에 다시 접으십시오.
자주 묻는 질문접힌 광장 안에 위치한 더 작은 다이아몬드.
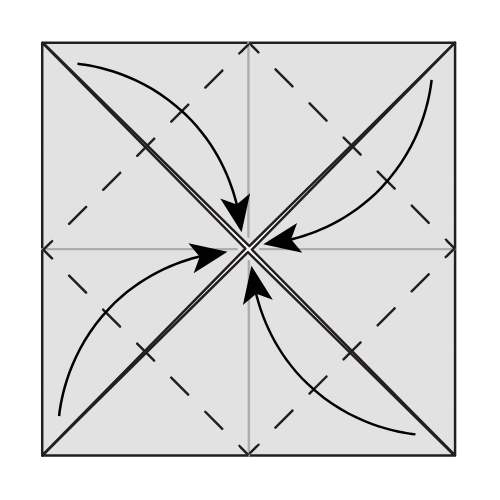
한국어04
한 번 더 코너에서 접어
4 개의 모서리를 중앙에 더 많은 시간을 접으십시오.
자주 묻는 질문층 모서리 플랩의 컴팩트 한 광장.
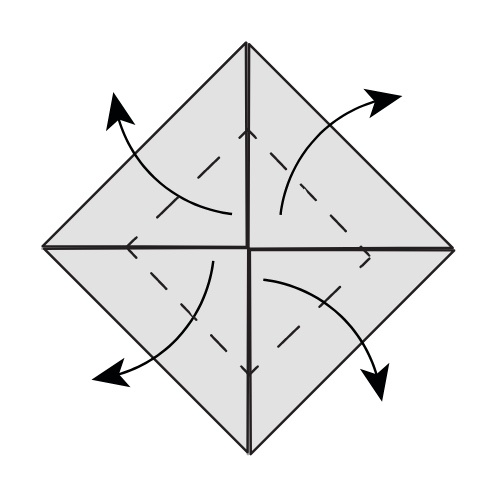
한국어05
상단 플랩을 엽니 다
각 플랩의 상단 층을 접어.
자주 묻는 질문4개의 외부 층은 중앙에서 멀리 열립니다.
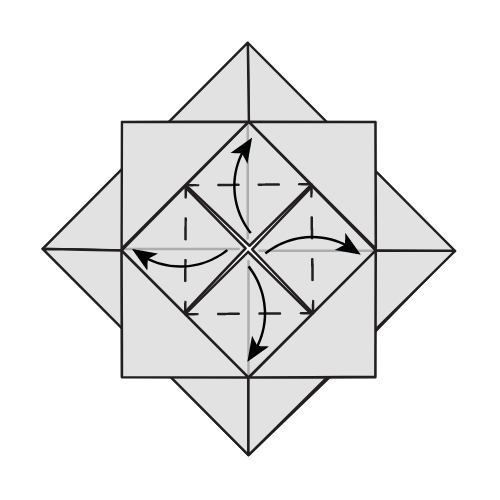
한국어06
1개의 층을 여십시오
1개의 층을 교차점으로 접어낸다.
자주 묻는 질문센터 주변의 애완 동물 같은 플랩의 두 번째 세트.
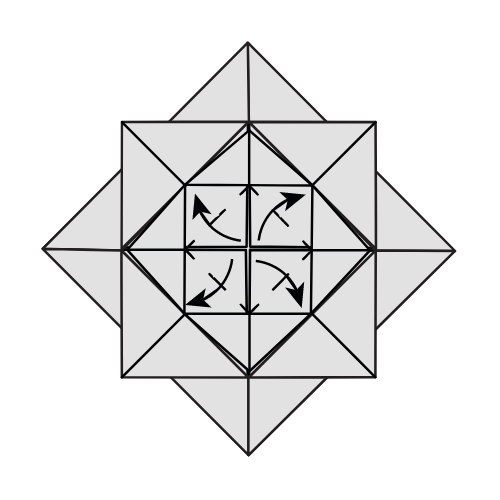
한국어07
마지막 층을 엽니다
마지막 층을 교차점으로 펼칩니다.
자주 묻는 질문3 중간 주위에 플랩의 배열.
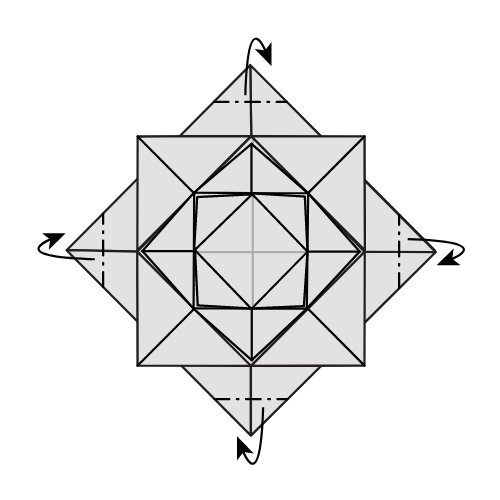
한국어08
산 접히는 구석 뒤
표시된 줄을 따라 모서리를 뒤로 펼칩니다.
자주 묻는 질문꽃 모양 뒤에 외부 구석 bent.
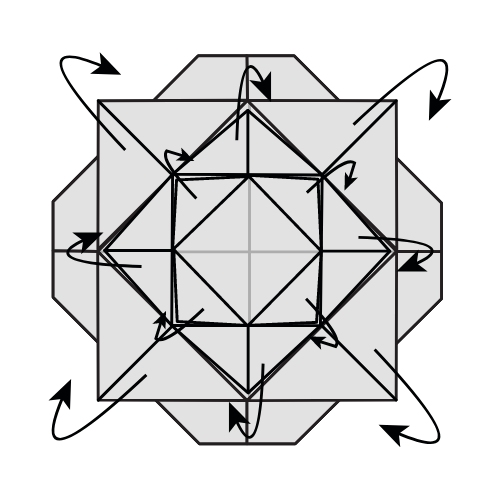
한국어09
아래 모서리를 Curl
Curl 모든 구석은 애완 동물을 형성하기 위해 내려갑니다.
자주 묻는 질문그 외의 꽃잎으로 덮인 장미.
화살표 키를 사용하여 단계 사이 이동
한국어1이름 *9: 둘 다 센터 creases를 만드십시오
당신의 장미가 준비되어 있습니다!
점차적으로 각 외부 구석은 그것의 층을 꿴 모양으로 장미를 엽니다.
전통 디자인, Kelly Tan에 의해 다이어그램과 에 의해 출판Origami.me·
- 애완 동물이 균등하지 않는 경우
- 마지막 코너 컬을 넓히고 한 번에 다시 형성하십시오.
- 층이 눈물을 시작하면
- 겹이 약간 열리고, 그 후에 더 적은 압력으로 다시 주름을 잡습니다.
- 중심의 이동
- 마지막 센터 접으로 돌아가기 전에 모서리를 정렬하십시오.