One square of paper, nine steps, no glue.

ひと折りから広がる創造力

Origami rose

Turn one square sheet into a layered paper rose in nine carefully illustrated folds.

  • とても簡単
  • 9ステップ
  • About 10 minutes
  • 1 square sheet

Paper: One 6 × 6 in (15 × 15 cm) square of Kami or Tant origami paper.

Your rose is ready!

9

numbered steps from square to rose

3

rounds of folding toward the centre

15cm

square Kami or Tant paper

0

cuts, glue or tape needed

Before you fold

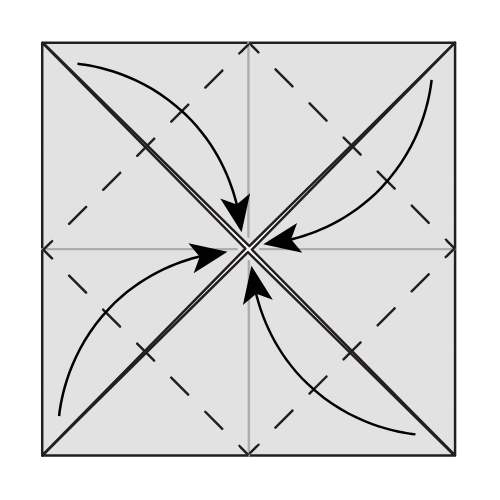
The diagrams use arrows and fold marks to show the direction of each move.

  • Dashed line

    Fold along here. The line disappears inside the model once folded.

  • Curved arrow

    This shows the direction the paper travels.

  • Solid arrows

    Fold or press the indicated layers in this direction.

  • Shading

    The shaded part is the layer currently facing you.

Keep the centre aligned as the layers build. Crisp, even creases help the petals sit neatly at the end.

Fold your rose

Step 1 of 9

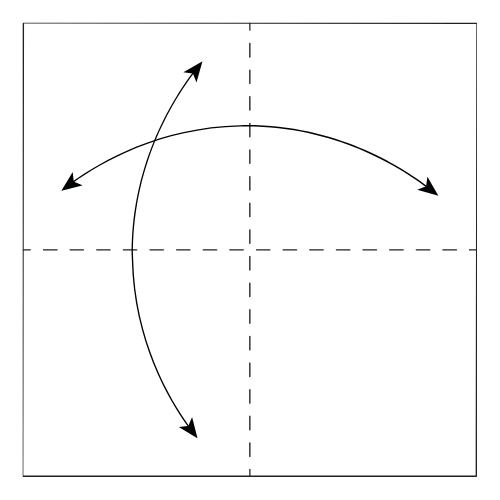
  1. Step 1: Make both centre creases

    Step 01

    Make both centre creases

    Fold and unfold the square in half both ways.

    You should seeA flat square with horizontal and vertical centre creases.

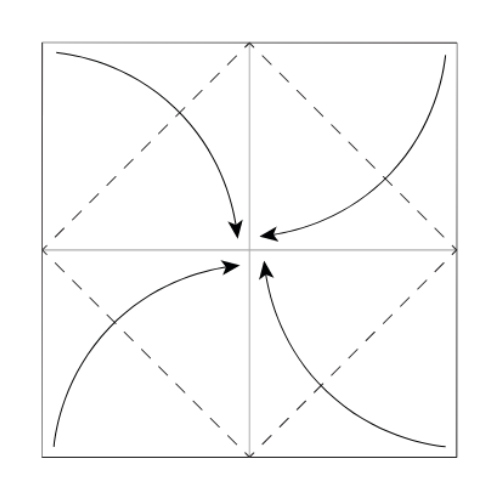
  2. Step 2: Bring the sides to the centre

    Step 02

    Bring the sides to the centre

    Fold the sides to the centre line, then turn the paper over.

    You should seeA square divided into four panels, with the other side facing up.

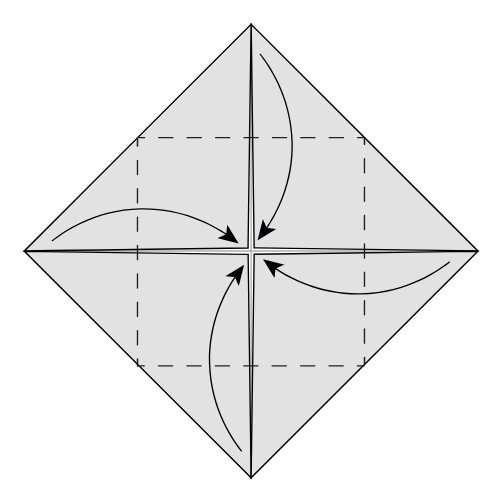
  3. Step 3: Fold in the corners

    Step 03

    Fold in the corners

    Fold all four corners into the centre again.

    You should seeA smaller diamond centred within the folded square.

  4. Step 4: Fold in the corners once more

    Step 04

    Fold in the corners once more

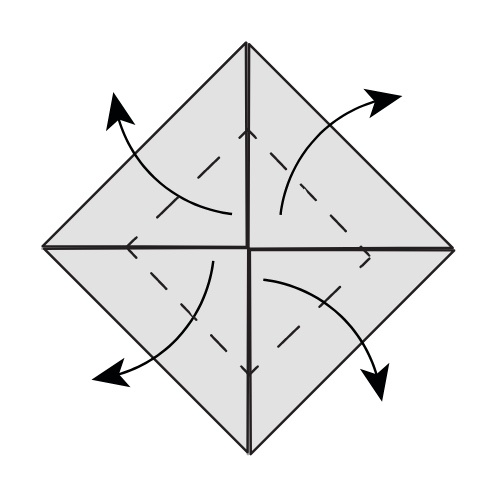
    Fold the four corners to the centre one more time.

    You should seeA compact square of layered corner flaps.

  5. Step 5: Open the top flaps

    Step 05

    Open the top flaps

    Fold the top layer of each flap outward.

    You should seeFour outer layers opened away from the centre.

  6. Step 6: Open one more layer

    Step 06

    Open one more layer

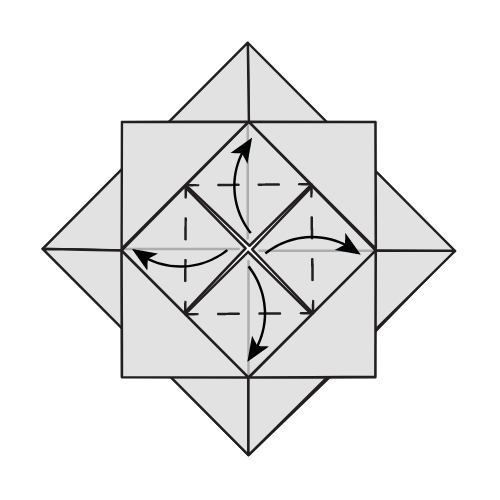
    Fold out one layer to its intersection point.

    You should seeA second set of petal-like flaps opening around the centre.

  7. Step 7: Open the final layer

    Step 07

    Open the final layer

    Fold out the final layer to its intersection point.

    You should seeThree nested rings of flaps around the middle.

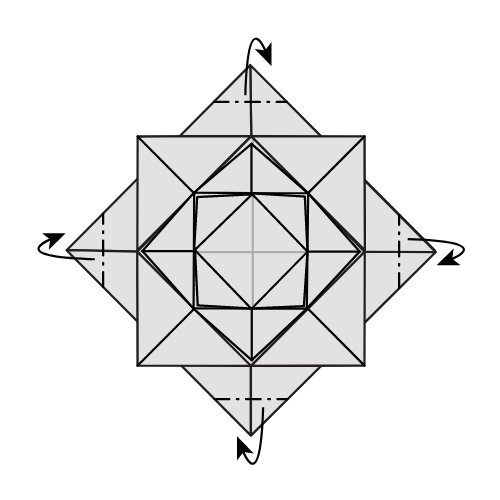
  8. Step 8: Mountain-fold the corners back

    Step 08

    Mountain-fold the corners back

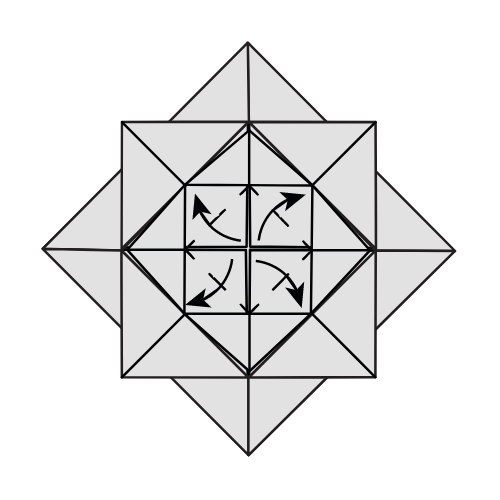
    Mountain-fold the corners back along the marked lines.

    You should seeThe outer corners bent behind the flower shape.

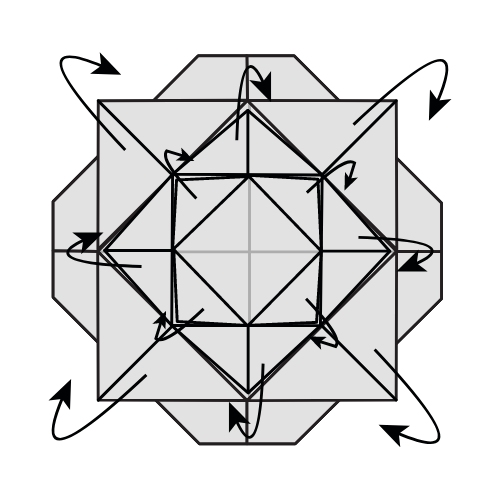
  9. Step 9: Curl the corners down

    Step 09

    Curl the corners down

    Curl all the corners downward to shape the petals.

    You should seeA layered rose with its outer petals turned down.

Use the arrow keys to move between steps

Step 1 of 9: Make both centre creases

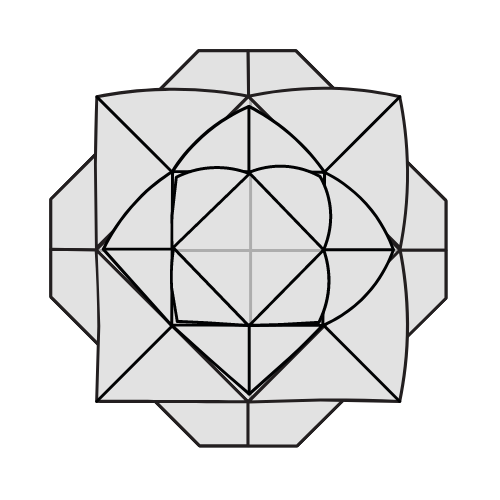
Completed layered origami rose viewed from above.

Your rose is ready!

Gently curl every outer corner downward to open the rose into its layered shape.

Traditional design, diagrammed by Kelly Tan and published by Origami.me.

If the petals do not open evenly
Loosen the last corner curls and reshape them one at a time.
If a layer starts to tear
Ease the fold open slightly, then crease it again with less pressure.
If the centre shifts
Return to the last centre fold and realign the corners before continuing.
More origami models