Creatività in ogni piega
Volpe origami
Piegare un foglio quadrato in una volpe in piedi amichevole in dieci punti chiari.
- Molto facile
- 10 passaggi
- Circa 10 minuti
- 1 foglio quadrato
Paper: 1 6 × 6 in (15 × 15 cm) quadrato diKamicarta origami.
Scritto e recensito daInThink Guide team
Recensione editoriale:14 settembre 2026
Riferimenti consultati: Origami.me
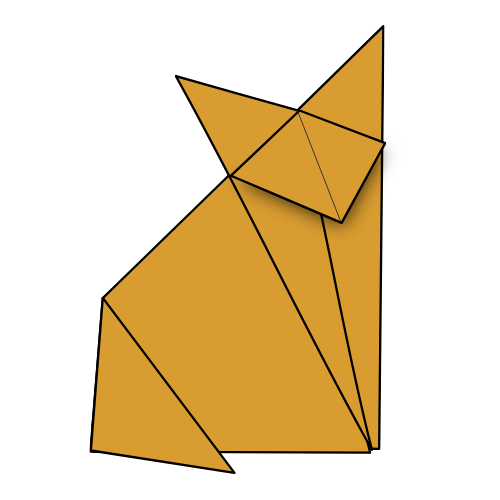
La tua volpe è pronta!
10
passi da piazzale a volpe
1
Avviamento scanalatura attraverso il centro
15cm
quadratoKamicarta funziona perfettamente
0
tagli, colla o nastro necessario
Prima di piegare
Ogni diagramma utilizza gli stessi tre segni. Imparare una volta e il resto della pagina si legge.
Linea trattenuta
Piega qui. La linea scompare all'interno del modello una volta piegato.
Freccia curva
In che modo il giornale viaggia. Una freccia schiacciata significa piegarla dietro.
Frecce solide
Spingi qui con le dita mentre gli strati si allontanano.
Colore e bianco
Il bianco è il lato iniziale del foglio; il colore mostra sulla volpe piegata.
Lavorare su un tavolo duro, piatto e premere ogni piega con la miniatura. Piccole pieghe affilate aiutano il supporto della volpe alla fine.
Piegare la volpe
Passo1di10
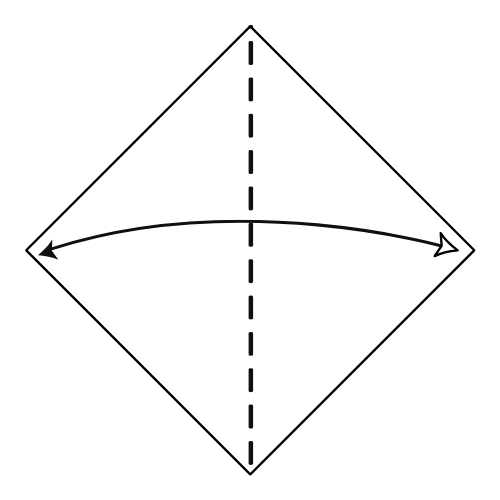
Passo01
Fare la piega centrale
Inizia con il lato bianco rivolto in posizione diamante. Piegare la carta a metà verticale, quindi dispiegarla.
Dovresti vedereUn diamante piatto con una piega verticale che corre dall'angolo superiore all'angolo inferiore.
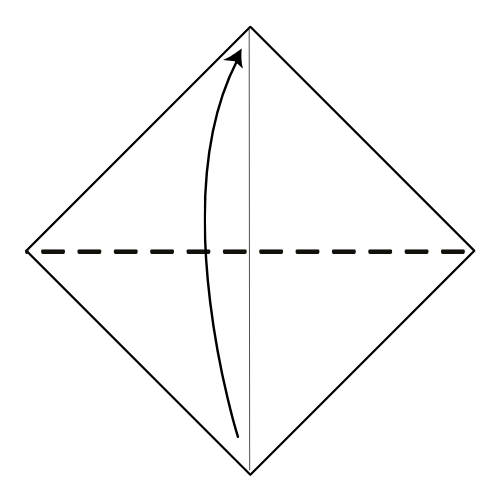
Passo02
Piegare la carta a metà
Piegare la carta a metà orizzontale, portando l'angolo inferiore fino a soddisfare l'angolo superiore.
Dovresti vedereUn diamante piegato a metà, con l'angolo inferiore che incontra l'angolo superiore.
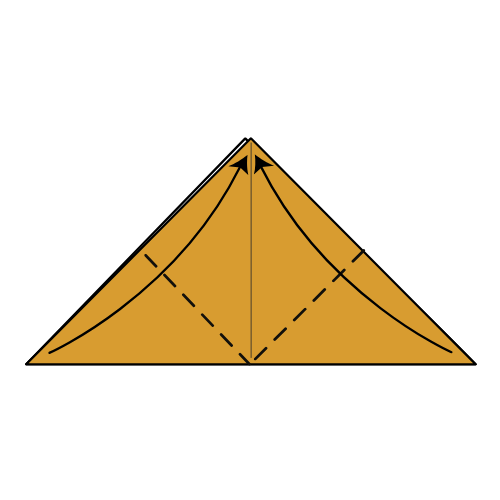
Passo03
Portare gli angoli laterali
Piegare gli angoli a sinistra e a destra per incontrare l'angolo superiore.
Dovresti vedereUn piccolo triangolo colorato con entrambi gli angoli laterali ripiegato in alto.
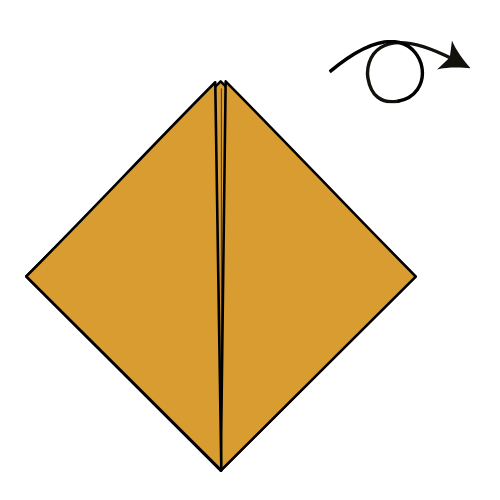
Passo04
Gira la carta
Girare il modello in modo che il lato colorato vi faccia.
Dovresti vedereIl diamante colorato rivolto verso l'alto, con una piega centrale che scorre dall'alto verso il basso.
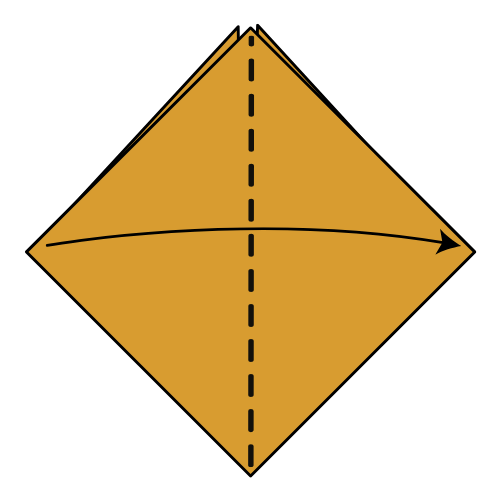
Passo05
Piegalo a metà
Piegare la carta a metà da sinistra a destra.
Dovresti vedereUna forma di diamante piegata con una freccia piega curva che mostra il movimento successivo.
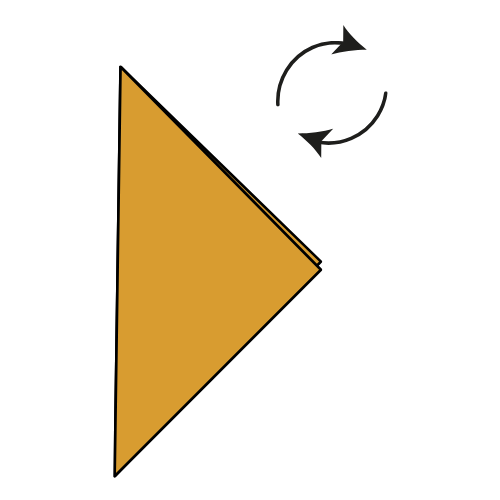
Passo06
Ruotare il modello
Ruotare la carta circa 45° in senso orario.
Dovresti vedereIl modello piegato girato così il suo lungo bordo rettilineo si erge verticalmente.
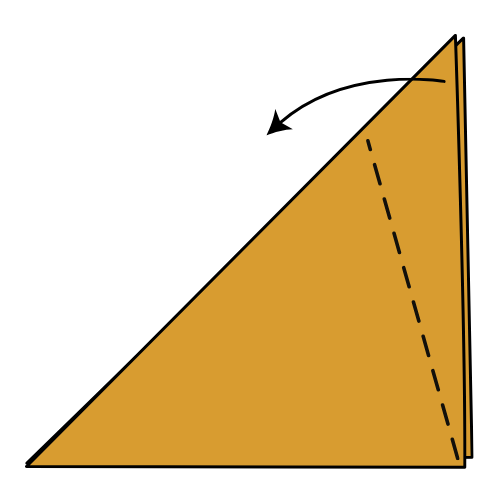
Passo07
Piegare il primo orecchio
Piegare il bordo destro del pattino superiore a sinistra lungo la linea tratteggiata per formare una delle orecchie della volpe. Non c'è un punto di riferimento esatto, quindi posizionalo ovunque ti piaccia.
Dovresti vedereUna patta triangolare piegata a sinistra, lasciando un punto alto a destra per il primo orecchio.
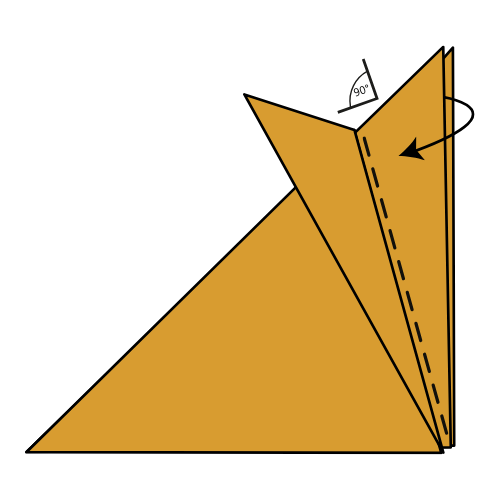
Passo08
Sollevare la patta centrale
Sollevare la patta centrale fino a raggiungere un angolo di 90°.
Dovresti vedereLa patta centrale alzata a destra, pronta ad aprirsi al volto della volpe.
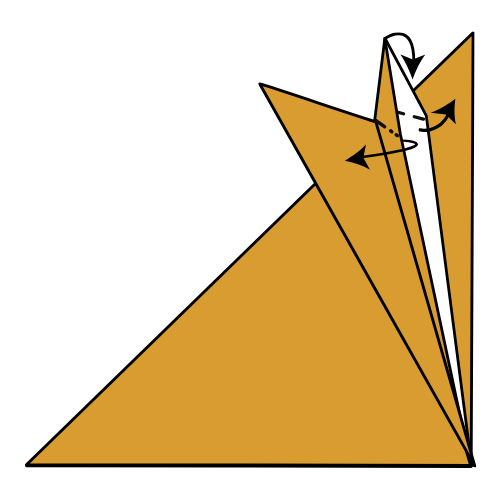
Passo09
Squash la patta centrale
Aprire gli strati della patta centrale, poi schiacciarli giù. Allineare l'angolo con la piega centrale.
Dovresti vedereGli strati si appiattirono in una testa appuntita, con la patta allineata alla piega centrale.
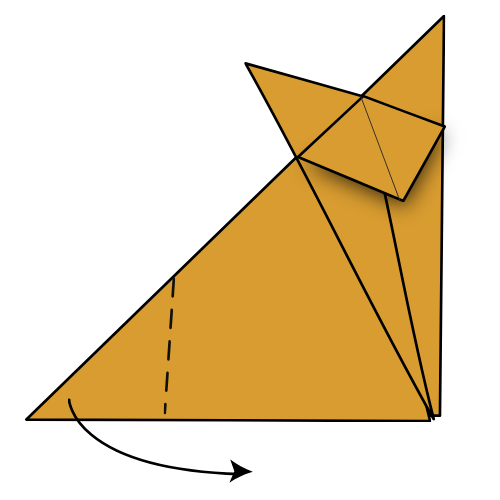
Passo10
Forma la coda
Piegare l'angolo sinistro verso l'interno lungo le linee tratteggiate per modellare la coda della volpe. Allineare i due bordi inferiori in modo che la vostra volpe può stare da solo.
Dovresti vedereUna volpe in piedi con orecchie appuntite, una coda piegata e due bordi inferiori allineati.
Utilizzare i tasti freccia per muoversi tra i passaggi
Passo1di10: Fare la piega centrale
La tua volpe è pronta!
Impostare la volpe su una superficie piana e regolare la coda fino a quando si bilancia da solo.
Progettato da Mitsuo Okuda, disegnato da Nick Robinson e pubblicato daOrigami.me.
- Se non resisterà
- Allineare nuovamente i due bordi inferiori e appiattire la piega di coda.
- Se un lembo piange
- Aprire la patta centrale lentamente al passo 9 e utilizzare il ditalino invece di forza.
- Se le orecchie sembrano irregolari
- Spostare la prima piega dell'orecchio leggermente fino a che entrambe le orecchie appuntite bilanciano visivamente.