La créativité à chaque pli
Tulipe d'origami
Plier une feuille carrée dans une tulipe fleurie en quatorze étapes, à partir d'une base de bombe à eau et terminer avec quatre pétales épluchés.
- Facile
- 14 étapes
- Environ 12 minutes
- 1 feuille carrée
Papier : Un carré de 6 × 6 po (15 × 15 cm)Kamidu papier origami.
Écrit et revu parInThink Guide team
Revue de rédaction:14 septembre 2026
Références consultées: Origami.me
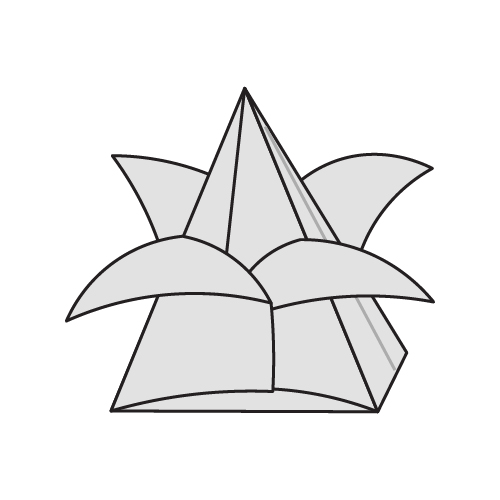
Ta tulipe est prête !
14
marches numérotées de carré à tulipe
4
les plis qui ont installé la base de la bombe à eau
15cm
carréKamipapier
0
Découpes, colles ou rubans nécessaires
Avant de plier
Les diagrammes utilisent des flèches et des marques de repli pour montrer la direction de chaque mouvement.
Ligne déchiquetée
Pliez ici. La ligne disparaît à l'intérieur du modèle une fois plié.
Flèche courbe
Ceci montre la direction que le papier voyage.
Flèches solides
Pliez ou appuyez sur les calques indiqués dans cette direction.
Ombre
La partie ombragée est la couche qui vous regarde actuellement.
Les étapes 1 à 5 construisent la base de la bombe à eau, ce qui les augmente fortement. L'étape 13 a besoin d'une bouffée d'air, donc gardez le trou du fond ouvert jusqu'à ce moment.
Plier votre tulipe
Étape1des14
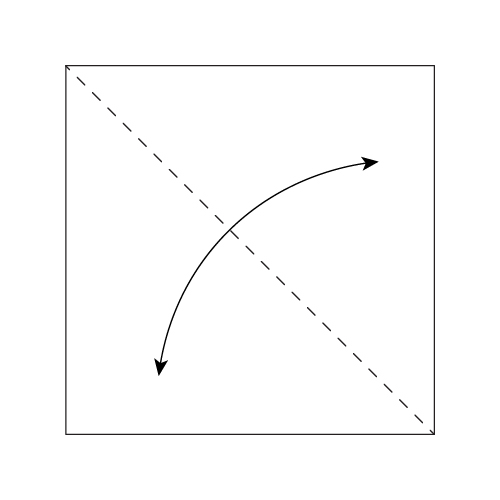
Étape01
Une diagonale
Commencez par le côté blanc. Pliez le papier en deux diagonale et déplier.
Tu devrais voir.Un carré plat avec une diagonale pliant coin en coin.
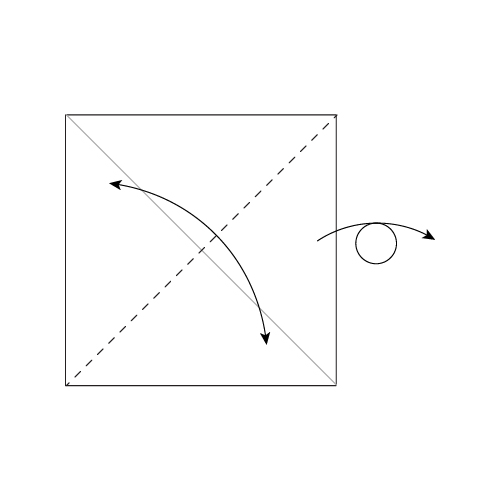
Étape02
Resserrer l'autre diagonale
Plier en double diagonale de l'autre côté et se dérouler. Retourne le journal.
Tu devrais voir.Un carré avec les deux diagonales creased, maintenant avec le côté coloré qui vous fait face.
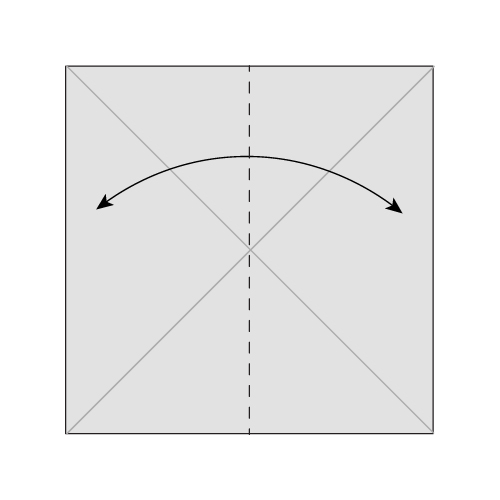
Étape03
Resserrer le centre vertical
Pliez en deux verticalement et déplier.
Tu devrais voir.Les deux diagonales plus un pli vertical à travers le milieu.
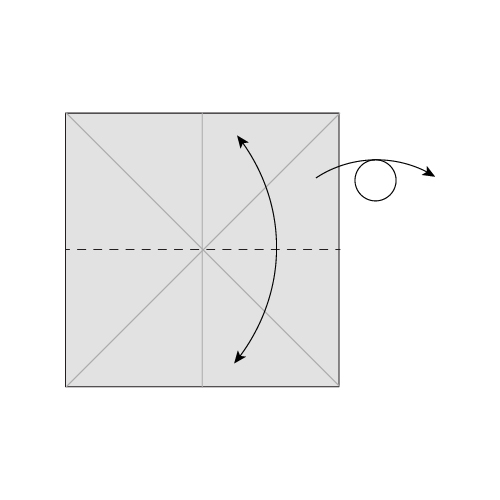
Étape04
Resserrer le centre horizontal
Plier en deux horizontalement et déployer. Retourne le journal.
Tu devrais voir.Un carré marqué de quatre plis se rencontrant au centre.
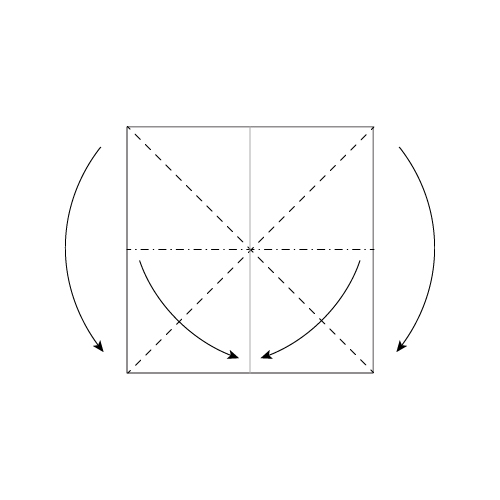
Étape05
Réduire la base de la bombe à eau
Effacer le modèle dans une base de bombe à eau, en faisant tomber les côtés en descendant le dessus.
Tu devrais voir.Un triangle plat en quatre couches, avec deux volets de chaque côté.
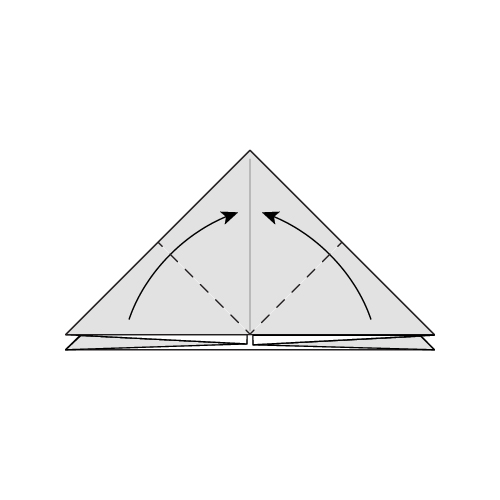
Étape06
Repliez les coins inférieurs vers le haut
Plier les coins inférieurs de la couche supérieure jusqu'à l'axe.
Tu devrais voir.Un diamant sur la face avant, les deux coins inférieurs se rencontrent au sommet.
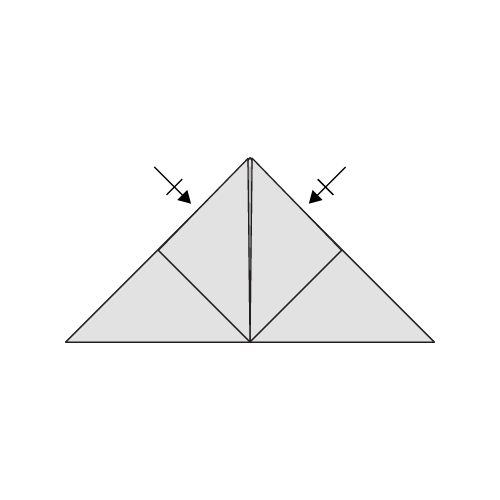
Étape07
Répéter derrière
Tournez le modèle et répétez l'étape 6 de ce côté.
Tu devrais voir.Un diamant assorti sur le dos, donc les deux visages sont maintenant identiques.
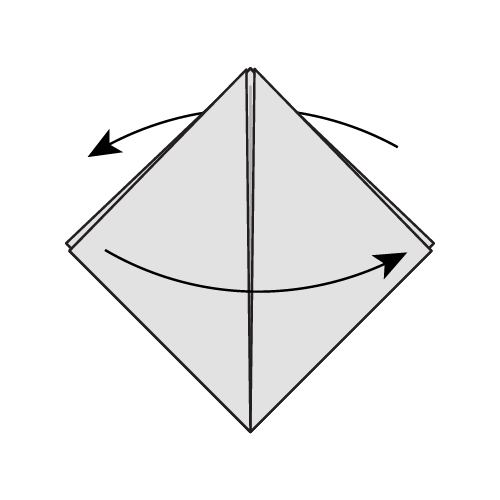
Étape08
Flip un rabat de chaque côté
Dépliez un rabat à droite à l'avant et à l'arrière, de sorte que les surfaces fraîches vous font face.
Tu devrais voir.Un diamant lisse devant et derrière, avec les bords lâches réaménagés.
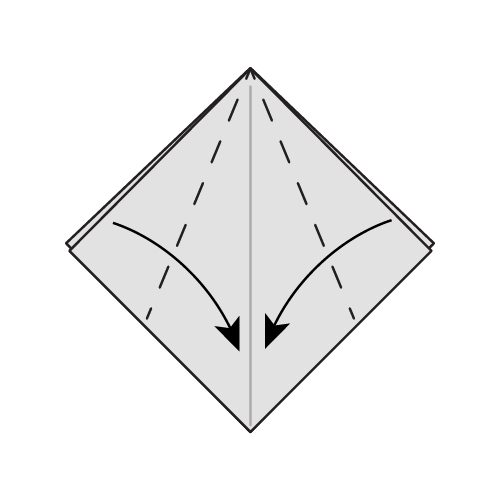
Étape09
Pliez les volets devant le centre
Pliez les volets des couches supérieures légèrement au-delà de l'axe.
Tu devrais voir.Deux volets se chevauchent un peu au milieu du diamant.
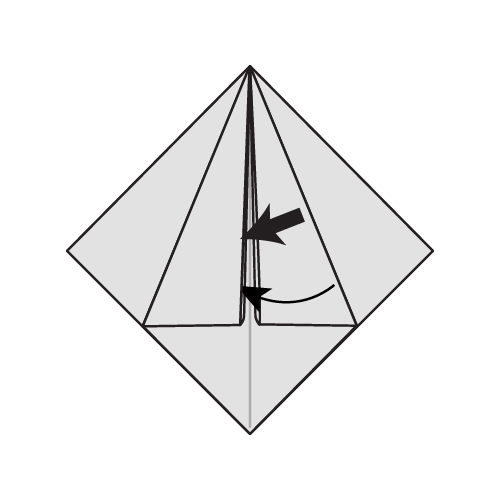
Étape10
Tuez un rabat dans l'autre
Ouvrez la poche gauche et insérez le rabat droit à l'intérieur.
Tu devrais voir.Les deux volets se verrouillent, tenant la face avant fermée.
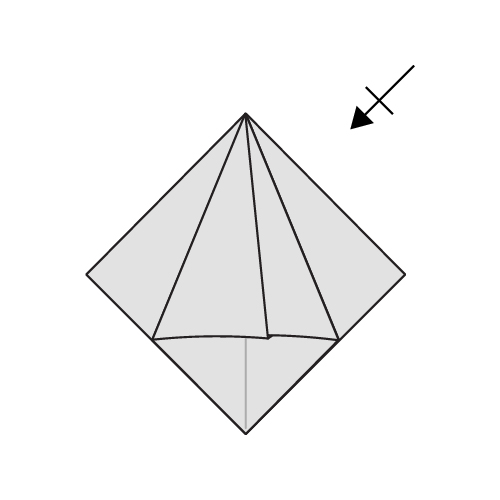
Étape11
Répéter derrière
Tournez le modèle et répétez les étapes 9 et 10 de ce côté.
Tu devrais voir.Les deux faces sont verrouillées, laissant une forme étroite avec un petit trou au fond.
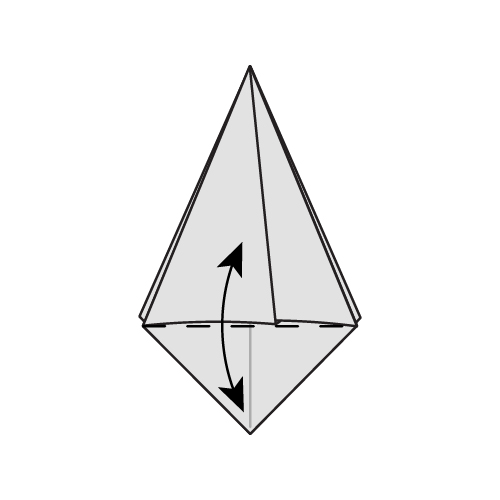
Étape12
Pliez et déplier le bas
Pliez et déplier la partie inférieure des deux côtés.
Tu devrais voir.Un pli sur la partie inférieure de chaque côté, prêt à façonner la base.
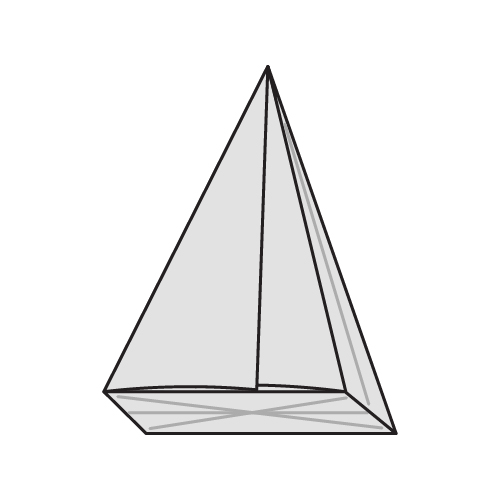
Conseil de pliage : si le ballon ne gonfle pas, essayez de pincer le haut en soufflant. Si ça ne marche toujours pas, aplatissez doucement le fond d'un doigt. 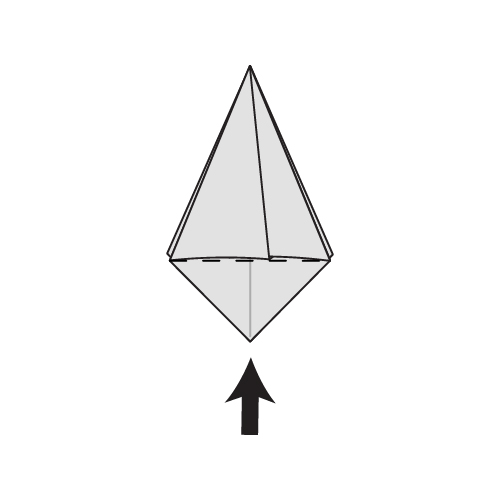
Étape13
Gonfler le modèle
Plongez dans le trou de fond pour gonfler et aplatir le modèle. Le fond doit être de forme carrée.
Tu devrais voir.Un corps gonflé assis sur un fond carré plat.
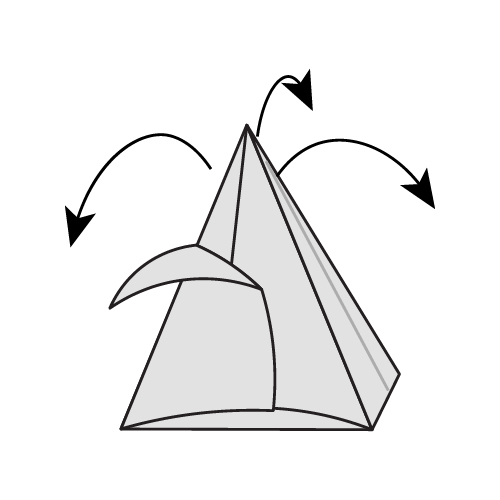
Étape14
Éplucher les pétales
Épluchez les 4 couches extérieures pour créer les pétales.
Tu devrais voir.Quatre pétales courbant vers l'extérieur de la base gonflée — votre tulipe finie.
Utilisez les touches fléchées pour déplacer entre les étapes
Étape1des14: Une diagonale
Ta tulipe est prête !
Tricoter chaque pétale au-dessus d'un doigt pour maintenir sa forme, puis tenir la tulipe sur sa base carrée plate.
Design traditionnel, schématisé par Kelly Tan et publié parOrigami.me.
- Si le tulipe ne se tient pas
- Aplatissez le carré du bas contre la table de sorte que les quatre bords de base s'assoient au niveau.
- Si un pétale pleure pendant que vous le pelez
- Ouvrez la couche plus lentement depuis l'extrémité, en maintenant le papier à plat contre votre pouce.
- Si le modèle ne gonfle pas
- Vérifiez que l'étape 12 a quitté la section inférieure, puis soufflez régulièrement dans le petit trou.