La créativité à chaque pli
Pingouin Origami
Pliez une feuille carrée dans un petit pingouin debout.
- Très facile
- 7 étapes
- Environ 5 minutes
- 1 feuille carrée
Papier : Un carré de 6 × 6 po (15 × 15 cm)Kamidu papier origami.
Écrit et revu parInThink Guide team
Revue de rédaction:14 septembre 2026
Références consultées: Origami.me
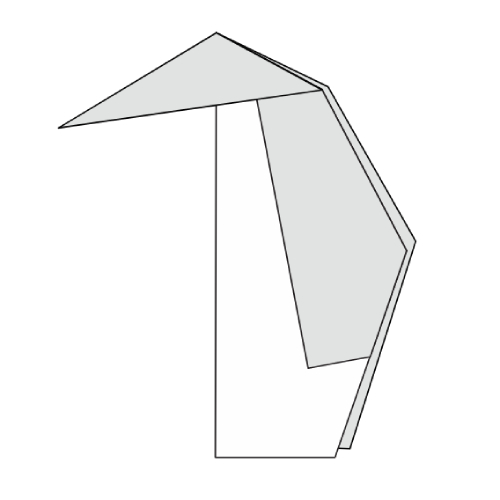
Votre pingouin origami est prêt !
7
marches numérotées du carré au pingouin
1
pli diagonal utilisé comme référence
15cm
carréKamipapier fonctionne parfaitement
0
Découpes, colles ou rubans nécessaires
Avant de plier
Les diagrammes utilisent des flèches et des marques de repli pour montrer la direction de chaque mouvement.
Ligne déchiquetée
Pliez ici. La ligne disparaît à l'intérieur du modèle une fois plié.
Flèche courbe
Ceci montre la direction que le papier voyage. Une flèche en boucle signifie retourner le modèle.
Flèches solides
Soulevez ou repliez le rabat indiqué dans la direction de la flèche.
Couleur et blanc
La couleur est le devant de la feuille, le blanc est le dos.
Faites chaque pli tranchant et gardez les deux côtés alignés avant de plier la tête.
Pliez votre pingouin
Étape1des7
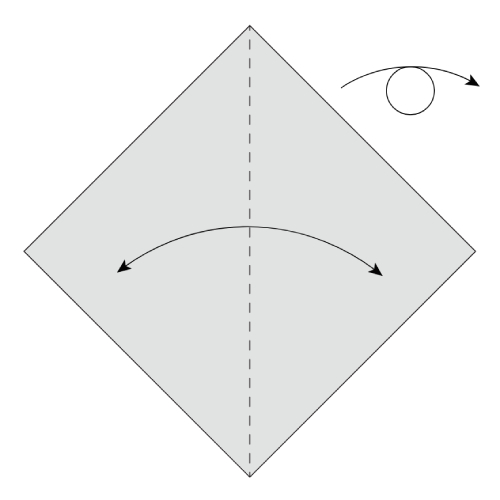
Étape01
Faire un pli diagonal
Commencez par le côté coloré vers le haut. Plier le papier en deux diagonales et le déplier, puis retourner le papier.
Tu devrais voir.Un diamant blanc avec une diagonale verticale.
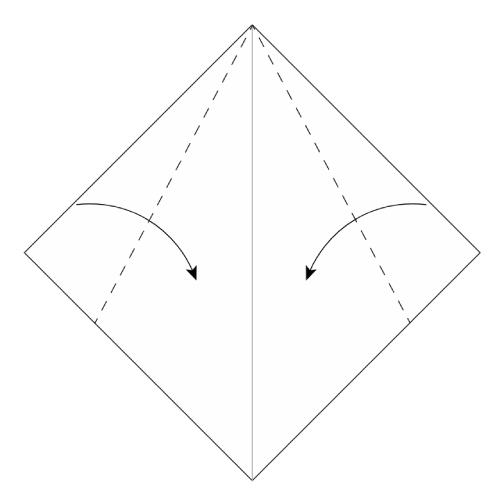
Étape02
Plier les bords supérieurs vers l'intérieur
Pliez les deux bords supérieurs vers l'intérieur. Arrêtez avant qu'ils n'atteignent l'axe.
Tu devrais voir.Deux longs volets inclinés vers le centre, avec un écart entre eux.
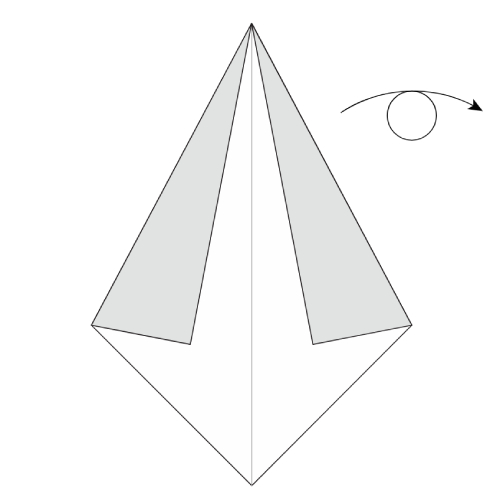
Étape03
Retourner le modèle
Retourne le modèle.
Tu devrais voir.Les volets repliés sont maintenant derrière le diamant.
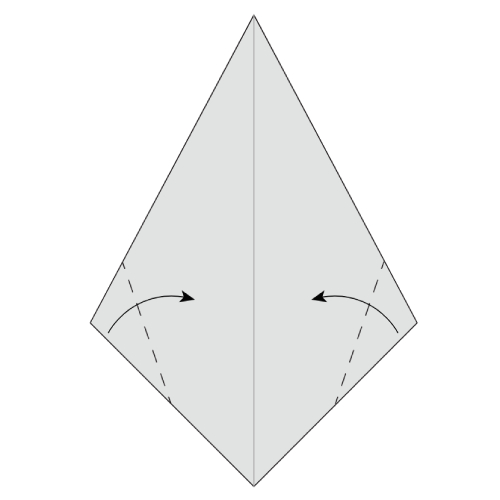
Étape04
Plier les coins vers l'intérieur
Pliez les coins gauche et droit vers l'intérieur le long des lignes pointillées.
Tu devrais voir.Une forme inférieure étroite avec des coins repliés assortis.
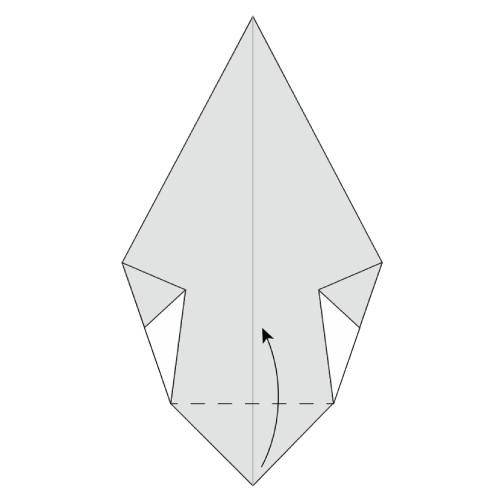
Étape05
Repliez le coin inférieur vers le haut
Plier le coin inférieur vers le haut, en utilisant les coins des plis précédents comme points de référence.
Tu devrais voir.Le point inférieur soulevé au milieu du modèle.
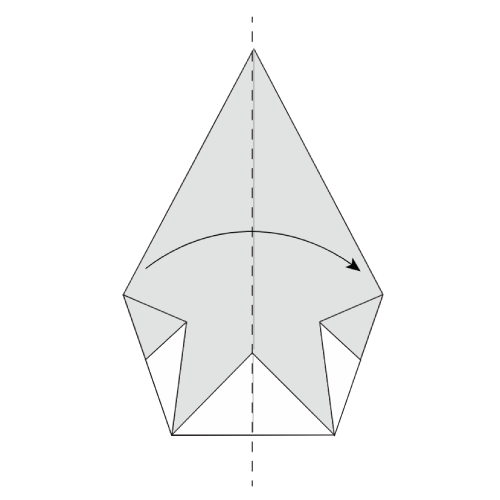
Étape06
Plier le modèle en deux
Plier le modèle en deux en utilisant le pli de l'étape 1.
Tu devrais voir.Une vue latérale mince avec les couches repliées ensemble.
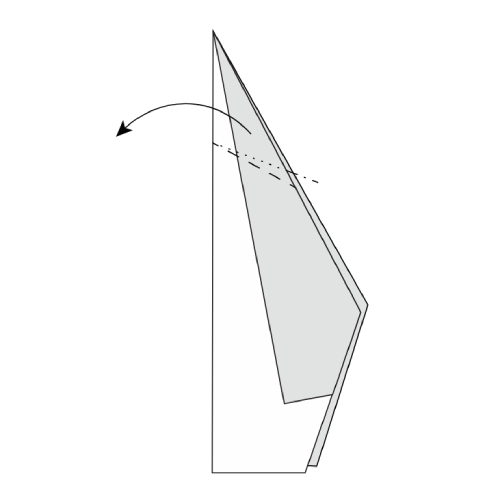
Étape07
Inverser la tête
Faites un pli arrière extérieur pour créer la tête.
Tu devrais voir.Un petit pingouin debout avec une tête pointue.
Utilisez les touches fléchées pour déplacer entre les étapes
Étape1des7: Faire un pli diagonal
Votre pingouin origami est prêt !
Réglez le pingouin sur une surface plane et ajustez doucement la tête pour qu'il se tienne bien.
Design traditionnel, schématisé par Kelly Tan et publié parOrigami.me.
- Si le pingouin se penche
- Réouvrez légèrement le pli final et alignez les bords inférieurs avant de friser à nouveau.
- Si les couches résistent au repli
- Soulagez le papier et reprenez la diagonale avec une touche plus légère.
- Si la tête est trop plate
- Répéter le pli inverse extérieur à l'étape 7 avec un pli légèrement plus ferme.