La créativité à chaque pli
Origami étoile chanceuse
Transformez une bande de papier étroite en une étoile à cinq points gonflée.
- Très facile
- 9 étapes
- Environ 5 minutes
- 1 bande de papier
Papier : Une bande de papier de 9 × 0,4 po (24 × 1 cm).
Écrit et revu parInThink Guide team
Revue de rédaction:14 septembre 2026
Références consultées: Origami.me

Ta bonne étoile est prête !
9
marches numérotées de la bande à l'étoile
5
enveloppes qui forment le pentagone
24 cm
long, bande de papier étroite
0
Découpes, colles ou rubans nécessaires
Avant de plier
Les diagrammes utilisent des flèches et des marques de repli pour montrer la direction de chaque mouvement.
Ligne déchiquetée
Pliez ici. La ligne disparaît à l'intérieur du modèle une fois plié.
Flèche courbe
Ceci montre la direction que le papier voyage.
Flèches solides
Appuyez sur ces points pour former l'étoile finie.
Ombre
La partie ombragée est la couche qui vous regarde actuellement.
Gardez les bords du pentagone alignés comme vous enveloppez. De petites inexactitudes deviennent visibles lorsque vous bouffez l'étoile.
Pliez votre étoile chanceuse
Étape1des9
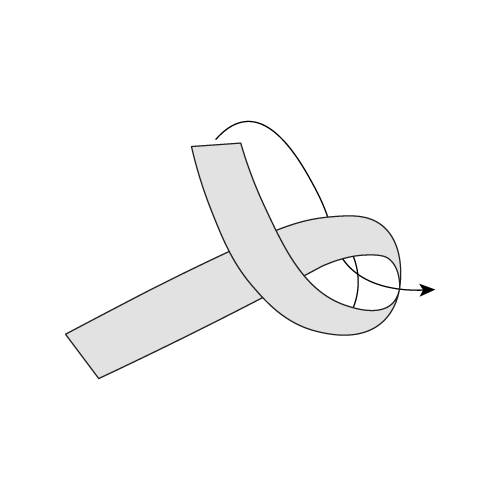
Boucle en cours. 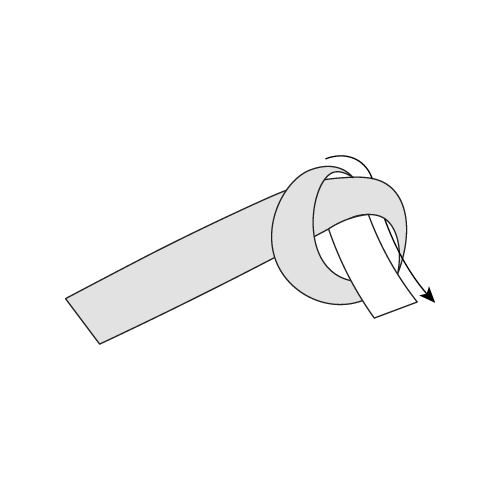
Tirez la boucle, laissant une courte queue. 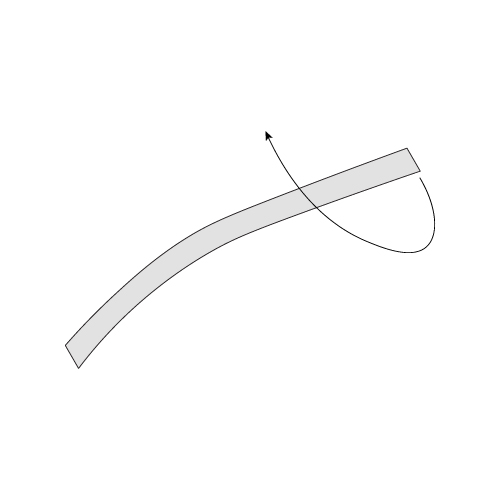
Étape01
Faire une boucle
Commencez par une longue bande étroite de papier. Formez une boucle à une extrémité et tirez-la, laissant une courte queue.
Tu devrais voir.Un noeud lâche à une extrémité de la bande, prêt à s'aplatir.
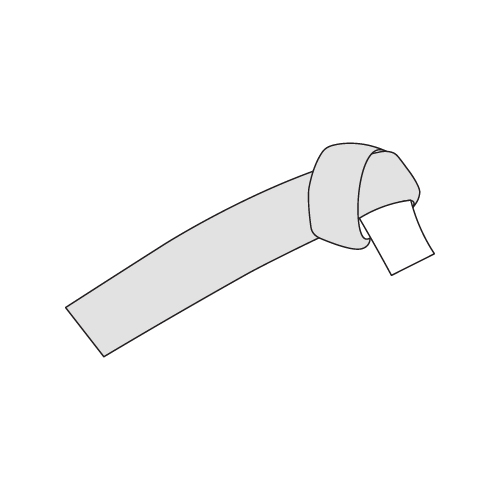
Étape02
Aplatir la boucle
Aplatissez la boucle pour former un petit pentagone.
Tu devrais voir.Un pentagone plat avec une longue bande et une courte queue.
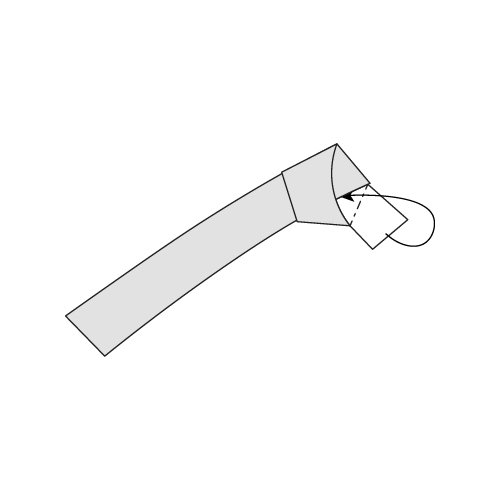
Étape03
Tuck la queue courte
Placez la bande courte restante sous les deux couches de la boucle.
Tu devrais voir.Un pentagone soigné avec seulement la longue bande restante.
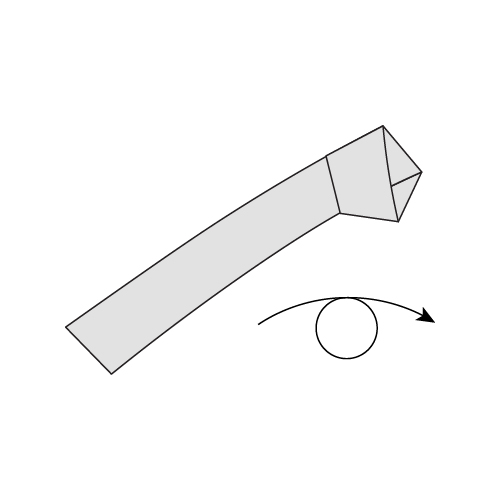
Étape04
Retourner le modèle
Dépliez le modèle.
Tu devrais voir.Le pentagone face à l'autre côté, avec la longue bande prête à envelopper.
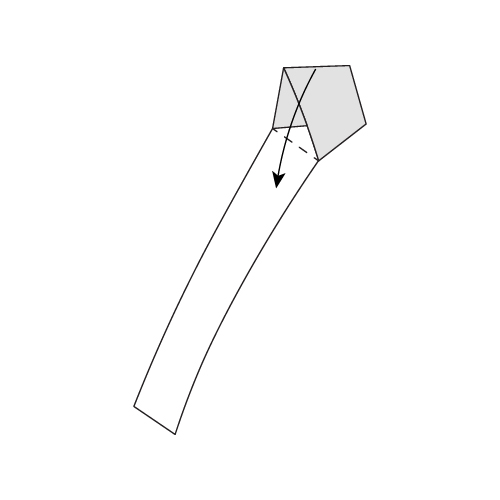
Étape05
Plier le long du bord gauche
Pliez la partie pentagonale vers le bas, en alignant son bord supérieur gauche avec la largeur de la bande longue.
Tu devrais voir.La bande enroulée une fois autour du pentagone.
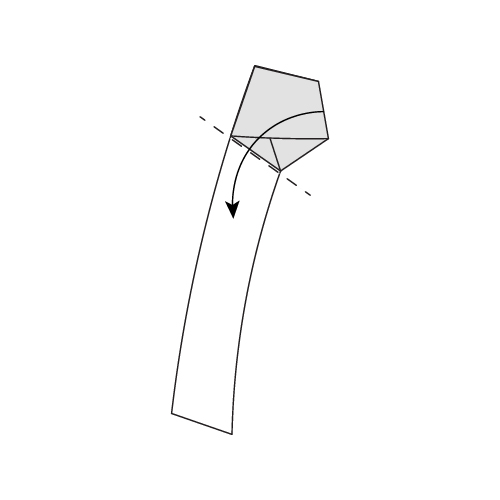
Étape06
Plier le long du bord droit
Repliez la partie pentagonale, cette fois en alignant son bord supérieur droit avec la bande.
Tu devrais voir.Une seconde enveloppe qui suit le bord suivant du pentagone.
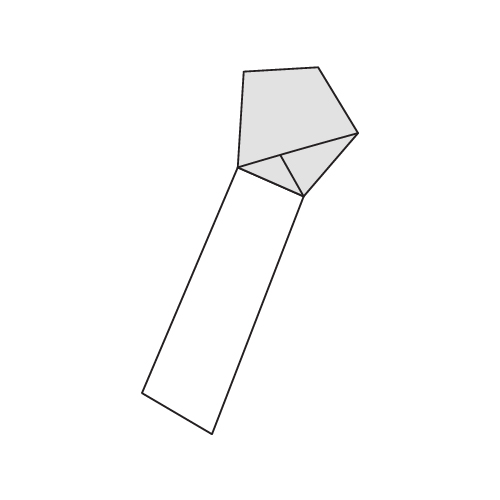
Étape07
Continuez à emballer
Répétez les étapes 5 et 6, en alternant les bords que vous alignez, jusqu'à ce qu'il ne reste qu'une petite bande.
Tu devrais voir.Un pentagone compact fait d'enveloppes en couches.
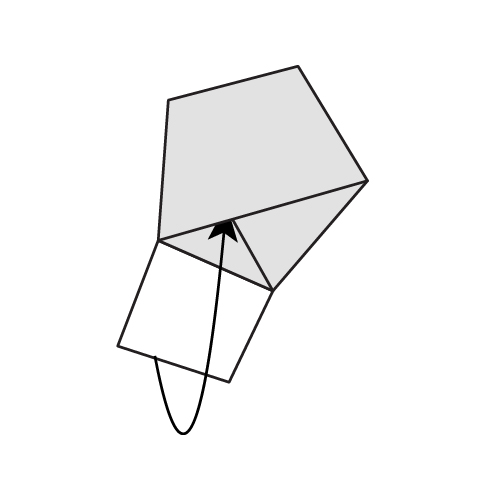
Étape08
Tuez la queue finale
Tuez la petite bande restante sous les deux couches, comme à l'étape 3.
Tu devrais voir.Un pentagone plat, entièrement fermé.
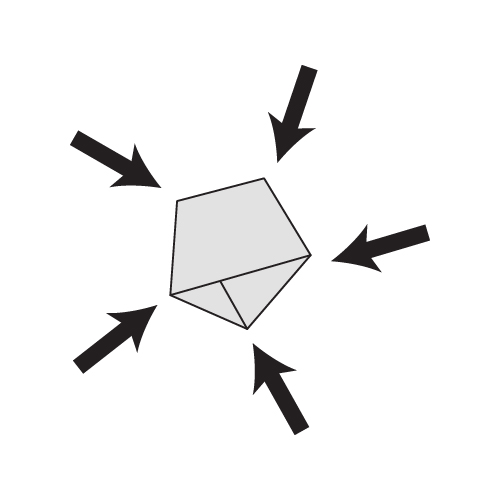
Étape09
Puffez l'étoile
Pincez aux cinq coins pour gonfler l'étoile.
Tu devrais voir.Une petite étoile à cinq points avec un centre surélevé.
Utilisez les touches fléchées pour déplacer entre les étapes
Étape1des9: Faire une boucle
Ta bonne étoile est prête !
Pincez chacun des cinq coins doucement pour gonfler le centre dans une petite étoile.
L'étoile traditionnelle finie a cinq points doux et un centre légèrement gonflé.
- Si le pentagone tourne
- Défaire le dernier enroulement et aligner son bord sur le pentagone avant de friser.
- Si le papier déchire
- Utilisez une bande légèrement plus large ou desserrez les enveloppes avant d'enfiler la queue.
- Si l'étoile reste plate
- Pincez un coin à la fois vers le centre au lieu de presser les cinq à la fois.