Creatividad en cada pliegue
Zorro de origami
Doble una hoja cuadrada en un zorro de pie amigable en diez pasos claros.
- Muy fácil
- 10 pasos
- Unos 10 minutos.
- 1 hoja cuadrada
Paper: Un 6 × 6 en (15 × 15 cm) cuadrado deKamipapel origami.
Escrito y revisado porInThink Guide team
Revisión editorial:14 de septiembre de 2026
Referencias consultadas: Origami.me
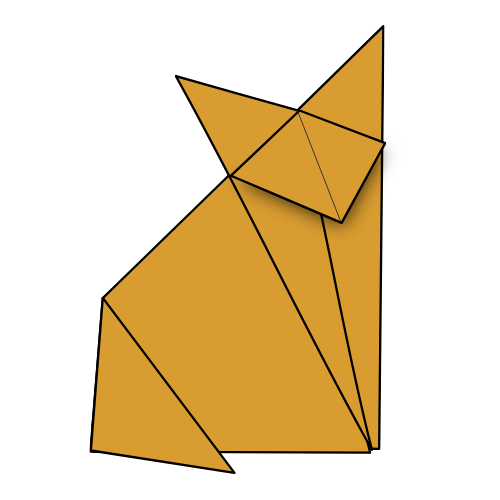
¡Tu zorro está listo!
10
pasos de cuadrado plano a zorro
1
starter crease a través del centro
15cm
cuadradoKamipapel funciona perfectamente
0
cortes, pegamento o cinta necesaria
Antes de plegar
Cada diagrama usa las mismas tres marcas. Aprende una vez y el resto de la página se lee.
Línea decorada
Doble aquí. La línea desaparece dentro del modelo una vez doblado.
Flecha curvada
Por donde viaja el periódico. Una flecha aplastada significa doblarla detrás.
Flechas sólidas
Empuja aquí con los dedos mientras las capas se separan.
Color y blanco
El blanco es el lado inicial de la hoja; el color muestra en el zorro plegado.
Trabaja en una mesa dura y plana y presiona cada pliegue con tu miniatura. Los pliegues pequeños y afilados ayudan al zorro al final.
Dobla tu zorro
Paso1de10
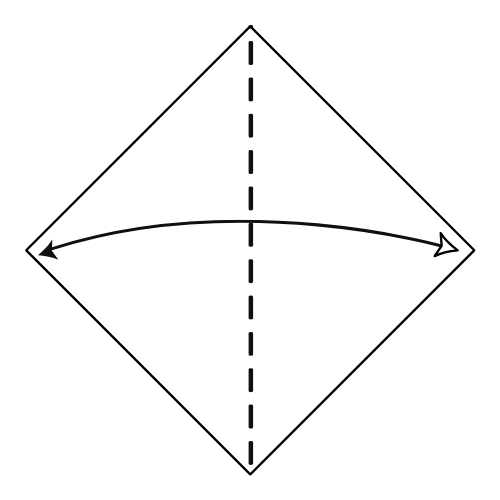
Paso01
Hacer que el centro crease
Comience con el lado blanco mirando hacia arriba en una posición de diamante. Doblar el papel en medio vertical, y luego desenvolverlo.
Deberías ver.Un diamante plano con un pliegue vertical que corre desde la esquina superior hasta la esquina inferior.
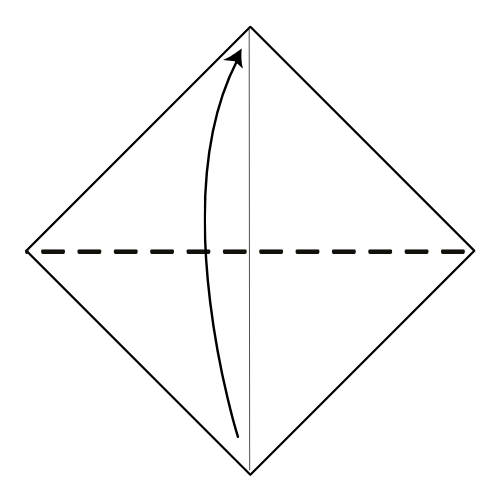
Paso02
Doble el papel en la mitad
Doble el papel en la mitad horizontalmente, llevando la esquina inferior hacia arriba para encontrar la esquina superior.
Deberías ver.Un diamante doblado en la mitad, con la esquina inferior en la esquina superior.
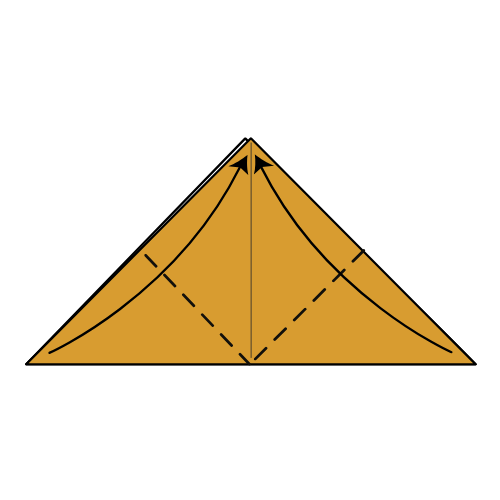
Paso03
Sube las esquinas laterales
Doble las esquinas izquierda y derecha para conocer la esquina superior.
Deberías ver.Un pequeño triángulo de color con ambas esquinas laterales dobladas hasta la parte superior.
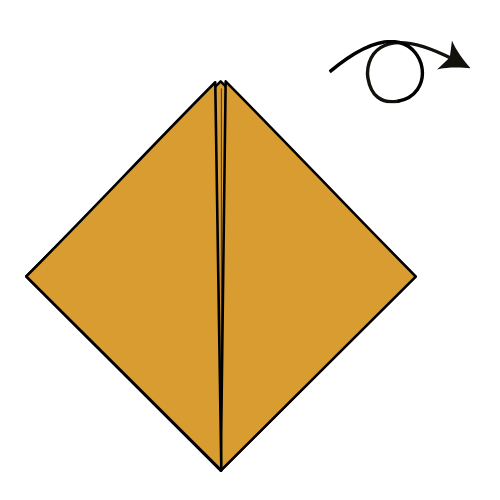
Paso04
Gire el papel
Gire el modelo para que el lado coloreado lo vea.
Deberías ver.El diamante de color que se enfrenta, con un pliegue central que corre de arriba a abajo.
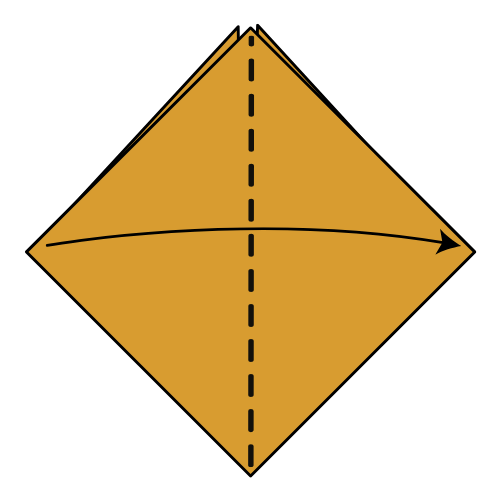
Paso05
Doble en la mitad
Doble el papel en la mitad de izquierda a derecha.
Deberías ver.Una forma de diamante doblada con una flecha doblada curva que muestra el siguiente movimiento.
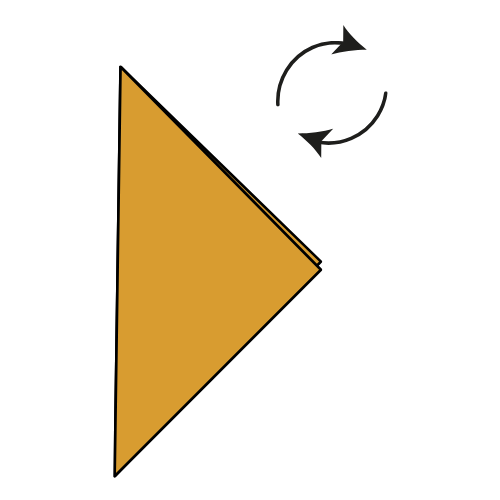
Paso06
Rotar el modelo
Gire el papel alrededor de 45° de ancho de reloj.
Deberías ver.El modelo plegado se volvió así que su borde recto largo se mantiene verticalmente.
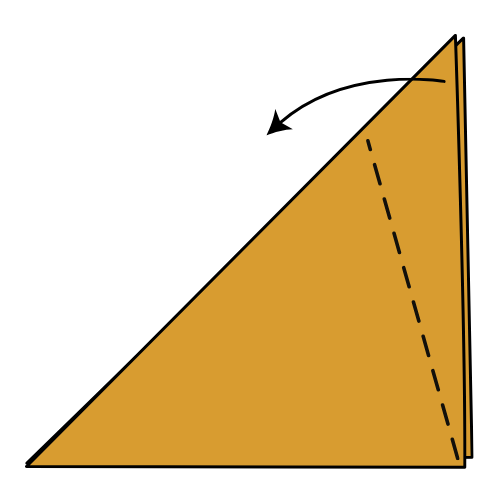
Paso07
Doble la primera oreja
Doble el borde derecho de la solapa superior a la izquierda a lo largo de la línea desgarrada para formar una de las orejas del zorro. No hay punto de referencia exacto, así que ponlo donde quieras.
Deberías ver.Una bofetada triangular doblada a la izquierda, dejando un punto alto a la derecha para el primer oído.
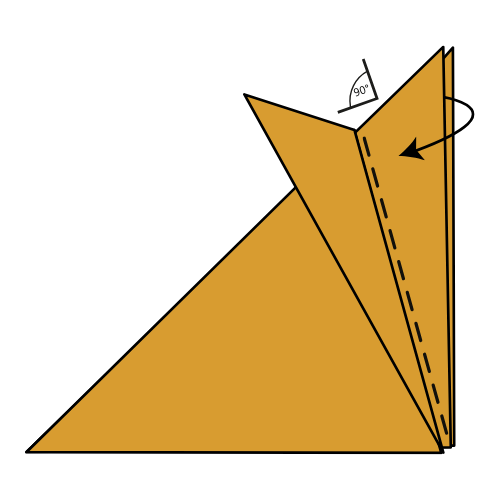
Paso08
Levante la tapa central
Levante la bofetada del centro hasta que se mantenga cerca de un ángulo de 90°.
Deberías ver.El azote del centro se levantó de pie, listo para abrirse en la cara del zorro.
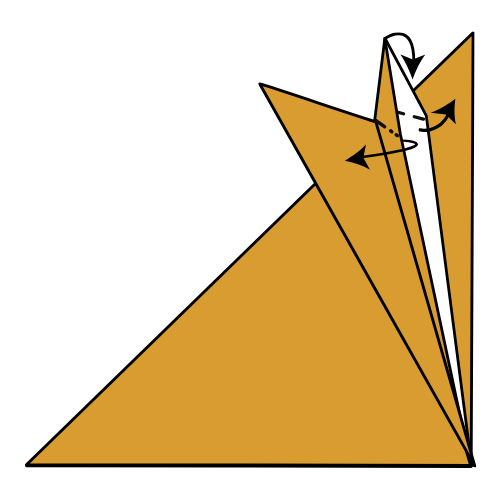
Paso09
Cuelga la tapa central
Abre las capas de la tapa central, y luego bájalas. Alinear la esquina con el pliegue central.
Deberías ver.Las capas aplanadas en una cabeza puntiaguda, con la solapa alineada a la creasa central.
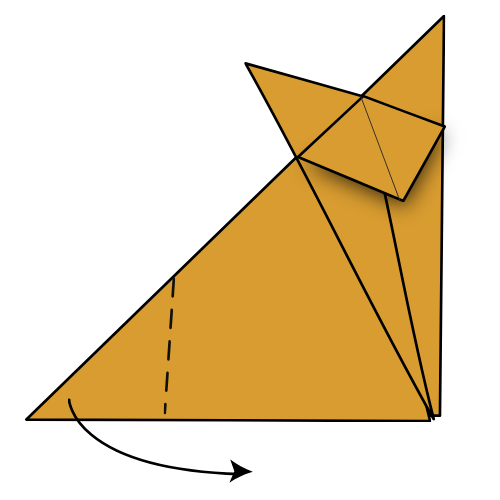
Paso10
Forma la cola
Dobla la esquina izquierda hacia dentro a lo largo de las líneas punteadas para dar forma a la cola del zorro. Alinear los dos bordes inferiores para que tu zorro pueda estar solo.
Deberías ver.Un zorro de pie con orejas puntiagudas, una cola plegada y dos bordes de fondo alineados.
Utilice las teclas de flecha para moverse entre pasos
Paso1de10: Hacer que el centro crease
¡Tu zorro está listo!
Establecer el zorro en una superficie plana y ajustar la cola hasta que se equilibra por sí misma.
Diseñado por Mitsuo Okuda, diagramado por Nick Robinson y publicado porOrigami.me.
- Si no se queda
- Alinear los dos bordes inferiores de nuevo y aplanar el pliegue de la cola.
- Si una lágrima de solapa
- Abra el centro aplauda lentamente al paso 9 y use la uñas en lugar de la fuerza.
- Si las orejas parecen irregulares
- Mueva el primer pliegue del oído ligeramente hasta que ambos orejas puntiagudas balanceen visualmente.